Showing posts with label self sufficiency. Show all posts

Tuesday, May 6, 2014

Why I Am Not A Prepper

The prepper movement is growing. And it has been for a while now.  The reasons behind it often seem quite valid to me. Whether it's a natural disaster, another great depression on the horizon, or the complete failure of the power grid. Those are all great reasons to "be prepared". But how you go about your preparedness is often where my similarity with the movement ends.
 
I was reading a blog post the other day about "the 7 foods you shouldn't stock up on" and it got me thinking.
If you're a prepper and you're simply saying, "For the next natural disaster, I am going to be prepared!" then more power to you! Way to plan! While everyone else is getting into fist fights down at the grocery store for the last can of tuna, you'll be home, knowing that you've got enough food and supplies to comfortably get you through the next few weeks (or months!) of turmoil.

 
What happens though when the food runs out? "But I have 3 years worth of food stored up!" you say. All right, what then after 3 years? What if we're living beyond just a natural disaster? What if life as we know it now ceased to exist? Having bunkers filled to the brim of food and supplies works well...for as long as that holds out.
 

I guess in a way, I am a prepper. But I'm a different kind. Instead of stocking up on things I want to know how to do things. I want to be prepared to feed my family off what comes from the homestead. Meat, milk, greens, fruits, and even grains. I want to be prepared to save seeds. I want to be prepared to breed and raise animals. I want to know how to feed our animals when the feed store isn't available. I want to know how to sew clothing. I want to know how to make soap, to care for our dental and medical needs, to do things without the use of electricity, propane, solar panels, wind turbines, or fuel. I want to be prepared with sanitation, with a clean water source, with a sustainable heat supply for our home in the winter. ...
I want to be prepared for if and when life does a 180 and we go back to the life people have known for thousands of years. That's my preparation.
 
I want to pray that the Lord would have mercy on my family and that He would bless our land, our animals, our efforts. For without Him, our lives would be nothing. He has given me a mind to learn and apply skills, but ultimately the success of our family comes from the Lord, as does the sun, rain, and everything that grows. I want to be obedient to His word and His leading. For our sufficiency is not of ourselves, but of the Lord.
 
Have these thoughts ever crossed your mind?

Monday, March 5, 2012

What Is It With Baby Chicks?

Have I gone insane? Are all the hens of the world dying and if I don't replenish my hens now, I'll never get another chance??

If you asked my husband that last question his answer would probably be, "Well, my wife seems to think so."

Here's how it all went down.

I thought it may be fun **and educational** to hatch a few baby chicks with a kindly loaned incubator. We got 8 chicks out of the deal.


I also put in an order with Mt Healthy hatchery for 15 pullets and 1 cockerel. Technically only 9 of those chickens were mine, the other 7 were a friends.

But, some of those didn't make it on the long trip and died. I called the hatchery. They're replacing my 5 dead chicks and they are also sending me 10 cockerels, for free, + 1 extra hen, to keep those 5 chicks warm on the trip. (Those said cockerels will be future chicken stock.)


A week before those chicks were shipped, I started incubating our Buff Orpington eggs. 8 are fertile and I'm hoping that all of them will hatch on the 17th of this month.


This past Saturday we made the long journey to Grants Pass, hauling our hogs to the butcher. We made the mistake of stopping by the Grange Co-Op. Guess what deal they had going on? Buy one 40lb bag of Organic Chicken Feed- Get 3 chicks free. I thought.......

STOP. Did I just read that right? You're giving away free chicks along with the bags of chicken feed we already buy???!! Did the heavens just shine down a ray of sunshine directly on me? Will my husband allow me to buy 8 bags??? Sadly, no.


Are you still with me here? I know that I'm not even with me here. 2 people in the last 24 hours have asked me how many chickens we have and I just stand there with a puzzled look on my face. "Um, well, ya know, I'm not quite sure right now."


Let's see....
8 chicks in brooder in garage (if my feather sexing was correct, 6 hens, 2 roosters)
4 chicks in brooder in 2nd bathroom
3 chicks in brooder at friends house (who I split the hatchery order with)
16 more chickens (including roosters) coming from hatchery this Friday. We'll see how many live.
8 eggs in incubator, due to hatch March 17th
1 duckling coming on Friday, as well, from feed store
9 hens outside
1 duck hen outside
1 rooster outside


See my dilemma? The next time someone asks me how many chickens we have I'm just going to say, "A lot."

Friday, January 27, 2012

The Best $28 Ever Spent

I'm all for being frugal. Sometimes a little too much in certain areas. There is, of course, that other side of me that isn't so frugal in other areas. But, we're talking saving money here so let's get on with it....
I am always searching for ways to cut our budget. About 2 years ago the thought came to me! Why am I paying to have my boys hair cut?! At that point we had 3 boys in the family (2 boys and one husband) that were regularly getting their hair cut about every 6 weeks. Now we have 4 (3 boys and one husband.)


A haircut in our area, for a boy, can run anywhere from $12-$20, depending on where you get it cut. So, let's do some math......


52wks in a year/ 6wks = 8.67 haircuts per year per boy


and 8.67 haircuts x $12-$20 per cut = $104 - $173


With 4 boys the total would then be $416 - $692 per year!!!


So, just over 2 years ago I ventured down to our local Wal-Mart and bought this....


For $28.


Yep. That is all I have spent on boy's haircuts in the last 2 years, a whopping $28.

Savings? Best case scenario = $832 (2 years worth) - $28 = $804
Now that is a chunk of change.


I do get my hair cut (for $20) about twice a year and Timber has yet to even need a haircut. Yay for being frugal! Excuse me while I go spend that extra money on fabric.........er, I mean bills.


Do you cut your boys hair? Have you ever figured up your savings for doing so?

Friday, September 30, 2011

Root Cellaring- A Give Away *CLOSED*

Technically it is still September. The 30th- but still September! I did get the opportunity to read "The Joy of Keeping A Root Cellar" earlier this month, I just haven't gotten around to putting up a post for the give away until now.
First, my pros and cons on the book.
Pros: The biggest thing that I love about this book is that the author actually HAS a root cellar on her farm. This isn't someone just writing about what she has researched. Jennifer Megyesi is living it at Fat Rooster Farm in Vermont.
The book has a bunch of information on canning, freezing and drying fruits, vegetables, herbs and meats. It also has some information on smoking meats. The story that Jennifer tells about her homemade smoker is hilarious! You'll have to read the book to find out for yourself.
There are also some great looking recipes included in the book.

Cons: My only real "con" in this book is the section on smoking. I would have loved to have more information on it, including lots of recipes and how to's. The only recipe that is shared in that section is one, "For five hundred pounds of hams." No, really, that's it. Of course, I could reduce the recipe by maybe 10 times to get something accurate on what I'd actually do here at home.

Overall, I really enjoyed this book. I hope that you will too!

To enter the give away please do the following:

1. Leave a comment here telling me what you'd most like to learn from this book.
2. (Optional 2nd entry) Blog about this giveaway for an additional entry and leave a SEPARATE comment telling me you did.
3. (Optional 3rd entry) FB or Tweet this giveaway and leave a SEPARATE comment telling me that you did.

The give away will be open until Friday October 7th.


What better way to be prepared than to have a supply of food at your fingertips that is preserved? Join the Preparedness Challenge!

Tuesday, September 20, 2011

The Cost of Raising Hogs for Meat

I finally took a few moments to sit down with my pen and paper, receipts, and a calculator to figure out the cost of our hogs this go 'round. I try to do the math every time we butcher because there are so many variables, how much we paid for the weaner (which by the way caused quite a ruckus in the feed store the other day when I asked the owner "how much he was selling his weaners for" and someone over heard me not knowing that I was talking about pigs), how big the hogs actually get before we butcher, how long we keep them, how much food they go through, etc.


So, for this time around our first hog weighed in at 250lbs, via the weight tape, a week or so before we butchered. Her hanging weight- which was her weight with no hide, no head, no guts, and no feet came out to 157lbs. I know that may seem like a huge difference but trust me, that huge head and the hide together weighs a ton!


-We paid $125.00 for the pig (we got it later than 8wks) normally, weaners are anywhere from $80-$100 in our area


-We spent $375.00 on organic hog feed ($750.00 really, since there are two hogs but I split the cost in half for one hog)


-We spent $4.00 in straw (again, halved for the one hog)


So, $125+$375+$4= $504.00 to raise a hog


Our meat then came out to $504/157 lbs = $3.21/lb


We are sending out one ham and the bellies to be smoked this time so our total cost will look more like this: $566/157lb= $3.60/lb


We saved the cost of butchering it by doing it ourselves. The last time we had a hog butchered off our property it was $50 for the kill and then $200.00 in cut/wrap/smoke fees. If we added those onto this hog it would have been $504+$200+$50= $754...then divided by 157lbs= $4.80/lb.


We're certainly saving money by doing it on our own. We can't buy organic pork, let alone bacon, for $3.60/lb. I know the bacon goes for something like $7.00/lb and I believe the chops are around $6.00/lb.


We'll be butchering our second hog in the next few weeks and then in October we'll be getting 2 more weaners. These should be a little less expensive, around $80.00 which will certainly make our bottom line lower. We'll be getting gilts again since we really enjoyed them this time. I actually enjoyed them so much that I was a little sad to see the first one gone but their purpose is food, not as pets. I'm thankful to have a freezer full right now!

Friday, August 19, 2011

reconsidering off grid

Don't you love it when other bloggers inspire you to really re-think things? Amy's post got me thinking about what it really means to be off-grid. To some it may simply be getting away from the power company. Not being wired into the system, using a generator/battery system, solar, hydro or wind power instead. But what about really being free from big industry and "the man?" Here are some things that came to my mind to consider as my family and I think about off grid living...


Power. Spending $15,000-30,000 on a solar system is fine. After all, the sun isn't powered by man. But what would happen if there was a collapse of society and then sometime after, the solar panels broke or wore out? How would I fix or replace them? What if I needed a new inverter; where would it come from? Can we figure out a way to live simply without power?


Photo Credit

Food. This is really two part- growing and eating. First, growing: How can I save seed from my garden? How am I going to feed my animals (chickens, cows, hogs...) without the help of the feed store? (At this point, we buy all of our feed except for the grass and bugs that the animals eat.) Would I be able to grow all of their food too? Second, eating: How can I preserve food without a freezer or refrigeration? How much do I really know about curing, salting, smoking, fermenting, and drying?


Photo Credit

Money. How much debt do we have? How can we free ourselves from that? What if there was no work for my husband? Could we survive on just our land and what it produced?


Water. How will we get it? Do we know how to build a hand-dug well? What other systems could we use to store up water sources such as rain water?Photo Credit

Everything Else. What about toothbrushes, clothes, vehicles, gas, lumber, toilets, toilet paper!, writing instruments, lighting, and the list goes on and on...


Could we really prepare ourselves to truly be off grid and without the modern things of today? Have you considered any of these? What have your thoughts been?

P.S. Don't forget about the beekeeping giveaway a few posts down!

This post is linked to the Preparedness Challenge.

Thursday, April 28, 2011

the experiment

With the wet weather that we continue to have (although the weather man does seem to be promising sunshine, after today's rain, for over a week) I decided to start my green beans indoors this year.


I normally don't start anything indoors. I just plant my seeds into the garden directly. Last year taught me a lesson though. I re-planted my pole beans 3 times thanks to slugs. We'll be adding 2 ducks to the homestead this weekend so hopefully that will help with the slime predators.


I'm not taking any chances this year and so I planted about 40 pole beans the other day. I don't have any creative set up for starting seeds indoors (like a UV light) and we hardly have room to place the little flats but starting them indoors may mean the difference in canning 50 Qts of green beans or 6.

Here's what I came up with....

Seeds like sunshine so I placed them on the kitchen counter somewhat near the window (which is about the most sun we're going to get in this house unless the seeds were in a bedroom.) Then I placed a heating pad underneath the flat to warm up the soil. I read that warm soil is what keeps the seedlings from growing tall and spindly.

I'm not sure that this really is going to work but it is worth experimenting with and everything I used, we already owned. It didn't cost a dime.

I'll let you know how it all turns out!

Wednesday, March 9, 2011

talk about rescourceful!

I'm currently in the process of reading 4 different books. I'm not sure that's a good thing. I'm feeling slightly overwhelmed by it all and realize that if I really want to get as much out of one book as possible then I should limit my reading.
On my list right now are:
Having a Mary Heart in a Martha World (this needs to be my first priority since it's also my Bible study)
(which technically was a birthday gift for Timber but I didn't realize how much good info was in it when I purchased it from Amazon used books!)
I'm only 1/4 of the way through the last 3 on that list but while reading The Little House Cookbook last night, I was inspired. When I told my husband of my inspiration he said I was crazy. I'm going to let you be the judge.
Do you recognize this bird?
I'm sure that most of you do. It's a Starling, also commonly called a Blackbird. Right now and throughout the summer we'll have a lot of them here; attempting to make nests in the bucket on Gavin's bucket truck and in the eves of our house. I've read that they are very pesky birds to farmers as well. Some may say that they're overly abundant. This idea seemed like a win-win situation to me...
Blackbird Pie
(from the Little House Cookbook)
Serves 6
12 Starlings, plucked and dressed
1 medium yellow onion
2 whole cloves
2 Tb browned flour (recipe below)
Salt and pepper
Sour Milk Biscuits (recipe below)
Needed utensils: Meat cleaver or scissors, 2qt. saucepan, bowl, rolling pin, 10" milk pan (or some type of pie-ish plate for baking)
With meat cleaver or scissors, cut birds in half along the breastbone or backbone. Put birds, giblets, onion and garlic in a saucepan with 2 cups of water and simmer covered about 2 hours, or until leg can easily be pulled from bird. About half the liquid will cook away.
Preheat oven to 400. Prepare biscuit dough, just moist enough to hold together in a ball.
Put the dough on a surface and roll out, with as few strokes as possible to a 10" circle, 3/8" thick.
Remove Starlings and giblets from broth to milk pan. Discard onions and garlic. Stir browned flour into the broth and heat it to boiling for a minute or two, stirring the while. Salt and pepper slightly thickened broth and pour over the birds. Cover the pan with the biscuit crust.
Bake pie at 400 for 10 minutes, then lower heat to 350 and bake for 10 minutes more, or until crust is cooked through.
Browned Flour:
In a skillet, over medium heat, toast the flour until it resembles cocoa powder, stirring constantly to prevent burning. It will take 10-15 minutes.
Sour-milk Biscuits:
2 c white flour
1 tsp salt
1 tsp baking soda
3/4 to 1 c cultured buttermilk
3 Tb drippings
Preheat oven to 425. Use oven to melt dripping sin pan or baking sheet. In a bowl, mix dry ingredients well. Turn pan to coat it with fat, then pour drippings into bowl and work into flour mixture. Add buttermilk and mix quickly to make a ball of dough. Turn onto floured surface and roll dough, lightly out to 3/8" thickness. Arrange biscuits side by side in pan, inverting them to grease tops ans well as the bottoms. Bake in upper half of oven for 12-17 minutes or law raw dough on top of Blackbird pie!

Now really folks, talk about self sufficiency! We've got these birds all over our property on a daily basis. We're talkin' free meat! But alas, Gavin isn't too excited about it. Maybe I can convince him to try it? We'll see!

Disclaimer: *Before shooting any wild birds on your property, please check with you local fish and game department. Unless, of course, you're one of those "live on the edge" kind of people*

Tuesday, March 1, 2011

One Reason We Homestead

In light of a short conversation I had and one overheard today, I felt compelled to share just one of the reasons we homestead. The conversations had to do with our government and food, specifically food prices. (Let's not even go there on recent GMO approvals!!) The talk got me thinking, one of the main reasons that we homestead is independence. Now I know that may sound cliche. We are living here in America right? The land that was founded on independence! The land where you could escape from the religious and lifestyle laws that we imposed onto you? For freedom! And yet all I really see is America becoming more and more dependent on it's government. Democracy? Pssh. Freedom? Ha. Why don't you ask the farmer in Wisconsin who's farm has been raided by the government time and time again about how free he feels. Raided by the government. Shut down. And for what? Because they're selling a wholesome, nutritionally sound product?
As far as I'm concerned (and you can call me crazy if you want) I'd love to take my family off to a place where the government no longer knows we exist! I'd be glad to hand in my social security number for someone else to use. Really, by the time Gavin is old enough to even draw social security it will be gone anyway.
Our current home is still run heavily on the help of the government. We have power and a phone, health insurance and vehicles. We have a mortgage! But we are working towards moving as far away from the support as possible. Doing what you can- at your home, with what you have available to you, is the first step in the right direction. So we have a garden, which I want to expand this year. We raise chickens, turkeys and hogs. We make our own soap and detergents. I sew some of our clothes (although I'd like to do more.) We're self employed.
Small steps in the right direction. On my to do list: get a milk cow, raise honey bees, raise lambs, raise beef, move off grid, grow a HUGE garden, and have a HUGE orchard. Some issues we just won't be able to get around, like having vehicles. My husband needs his work truck for...work. I don't know how many trees he'd be able to trim with a horse and buggy. We can't grow our own grains at this point so we have to buy grains to mill into flour and for our animals. Building supplies for the house. We can mill our own wood but, nails, screws? I guess it all just depends on how independent from the world you want to be. There are luxuries that I do appreciate- like gas stations and my dishwasher. But the further removed we can be from it, the better off we're going to be in the future.
*I am now stepping down from my soap box. Thanks for listening!*

Saturday, February 19, 2011

Butchering the Homestead Hog

Last weekend we butchered our second hog. Having done the same thing only a month and a half before, the process was streamlined and went much smoother this time around. It didn't hurt either that we had some of our best friends here to help us with the process.
We started at about 9am and were finished by 4pm. Everything was cut, wrapped and cleaned up. We did take the bellies and one leg to Taylor's to have them smoke the meat into bacon and ham. Taylor's offers a celery salt cure which is chemically nitrate/nitrite free. There are naturally occurring nitrates in celery salt. While we would like to be able to smoke our own meat and some point (Gavin has a smoker that is out at his parents) we just don't know much about it to feel knowledgeable enough to start. *There's a whole nother homesteading skill I'd like to acquire!*
Here are some pictures of how our day went. Warning: these may be graphic to some, totally normal to others. If you don't like the sight of blood or gutting an animal then please do not proceed.


Getting started: Gavin had already shot the pig and Ida is getting it nice and clean. Timber is looking on.

Gavin digging the hole for the guts. You can just take your guts to the dump but if you have the room on your property to bury them it certainly saves money and time.
Gavin and Rob beginning to gut the hog.
This is what the kids did for the gutting part. They built a fire and played. Once in a while they'd come over to see how it was going. We feel that it's important not only for our children to know where their meat comes from, but to have an appreciation for the animal and to know the work that goes into getting that meat to your table. With grocery stores now a days, I think we are far too removed from how the food we are eating, especially when it comes to meat, got to our plates.
Gutting the hog.
Removing the heart and lungs.
Skinning the hog. Now, most people don't skin hogs, they scald them. We are very new to the process of processing hogs so Gavin has just went with what he knows how to do well from hunting, and that is skinning. We could get the large drum of boiling water and scald it but we haven't ventured there yet. If you have any good tips or experiences with scalding hogs that you can share, pleas do share!


After the guys had skinned it, Ida and I went over the carcass and trimmed as much fat off as we could to make lard.


Removing the forelegs. Ida and I then went into the house and started cutting up meat. The guys continued outside taking the hog apart piece by piece. At that point I got a little sidetracked with it all and forgot to take many more photos!


Our backwoods butcher shop.


Some ribs and one belly reading for wrapping.


We buy butcher's paper at our local hardware store to wrap our meat. We cut the shoulders and one leg into roasts, the bellies go for bacon, the tenderloin, ribs, and chops are cut and wrapped, the other leg goes for smoking, and the rest is ground for use in sausage patties, tacos, etc. I have read a bit about making head cheese but I think my husband is too grossed out about it for me to try. Have any of you ever eaten head cheese? Or made it yourself? What did you think of it?

The Foxfire Book is a fantastic backwoods homesteading book that we've used as reference quite often when it come to butchering hogs. If you don't already own it, I'd recommend investing in it at some point.


If you have any good hog butchering tips or stories, I'd love to hear about them.


Saturday, January 1, 2011

Happy New Year and a December Recap

Happy New Year to you all! I pray that God blesses you abundantly this 2011!

December has been a super busy month for us and I, obviously, only blogged twice the entire month! Here's a quick re-cap of what went on at our homestead in December.

We started the month finding our tree and getting ready for Christmas. We gave away a lot of handmade gifts this year which included canned goods, like applesauce and jams along with homemade soaps. The older boys love to help make applesauce. I think it's the peeler/corer tool. If you don't have one of these, invest in one and watch your children enjoy helping with ever last apple!

We also spent a lot of time baking. Seriously.


On our holiday baking list this year were, Gingerbread cookies, peppermint brownies, raspberry jam thumbprint cookies, peanut butter and chocolate truffles, mexican wedding cakes, cranberry snow candy, black bottom cupcakes and yes, more gingerbread cookies! We even had a day where we decorated gingerbread with some friends.

Our animal count, here on the homestead, dropped by three this month. One was unplanned and sad, the other two were planned and worked out great. The first, unplanned one was having to say goodbye to one of our dogs. He was 13 and I'd had him since he was 6wks old. We had found out in October that he had bone cancer in his left foreleg. Just before Christmas he was barely walking and we decided that it was time to put him down. My eyes still well up at the thought of that day but I am glad that he is out of pain now.


Our two other planned losses were a rooster (we had two and only have 8 hens!) and one of our hogs.
After butchering the turkeys last month, I have to say this chicken was CAKE! It went super fast and easy. Maybe starting off with a big bird is the way to go- it makes everything else seem like child's play. We ate him (our first home raised chicken) 2 nights later. While he was young, (only about 7months old) his thighs were a little tough but everything else on him was great. Since he was a Buff Orphington, his breasts weren't as large as you'd find on a meat chicken but still turned out all right.
Our hog experience was slightly.... a mess. I'll spare you the details and any photos. This was our first home raised, home butchered hog. Gavin did it on one of the worst days of our most recent storm. We'll be butchering our other hog at the end of January. Hopefully the weather will be better and the process will go more smoothly. I'll share shots of that one later. But for now, there's one hog in the freezer!

A special little someone turned 4 this month and we also celebrated both my Dad's and my MIL's birthday.


Layton is a big boy now so he gets to cut his own cake!


He was thrilled to get his very fist gun this year. A Daisy pellet gun. He's been out back shooting a couple times a week trying to improve his aim. For just turning 4, I'd say he does pretty well.


Mason has taken to reading all the books he can get his hands on. Well, maybe not really reading, but at least pretending to. We read through "The Courage of Sarah Noble" as a family in the evenings. While it is a book geared towards 3rd or 4th graders, even my 8th grader was eagerly waiting to hear "what happens next" each night.

Christmas was a blessing. We enjoyed the time together as a family and of course, attempted to snap another family picture. Ya know, one where everyone is smiling at the same time and all looking at the camera? This one didn't turn out too bad I suppose.

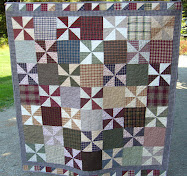
One great thing about winter? Being forced to be indoors. Not that I enjoy having to be inside all the time. Actually, I'd much rather spend my time outside but with all the rain and hail and storms we've been having, inside time allows for more inside tasks....including quilting! I've been trying to work on a few quilts here and there and I'm proud to say that I'm actually making progress. Being cooped up also allows more time for reading. Another favorite past time of mine. Do you enjoy reading? Would you like to have another book added to your collection to read through this winter? Well, if you've actually stayed with me though this entire post then you're more than entitled to entering the giveaway for "Country Wisdom and Know How." Really, if you've made it through all of this I wish I could just give each of you a copy for being so faithful! But I only have one to give away so here we go:

Here's a brief description: "Reminiscent in both spirit and design of the beloved Whole Earth Catalog, Country Wisdom Know-How is an unprecedented collection of information on nearly 200 individual topics of country and self-sustained living. Compiled from the information in Storey Publishing's landmark series of "Country Wisdom Bulletins," this book is the most thorough and reliable volume of its kind. Organized by general topic including animals, cooking, crafts, gardening, health and well-being, and home, it is further broken down to cover dozens of specifics from "Building Chicken Coops" to "Making Cheese, Butter, and Yogurt" to "Improving Your Soil" to "Restoring Hardwood Floors." Nearly 1,000 black-and-white illustrations and photographs run throughout and fascinating projects and trusted advice crowd every page."

Rules:
This giveaway is open to everyone!
Giveaway ends January 15th at 8pm PST
For 1 entry, please leave a comment below; any kind of comment is fine.
For a 2nd entry, please Facebook or Tweet about the giveaway and leave another comment telling me that you did
For a 3rd entry, please blog about it and leave another comment telling me that you did
Winner will be drawn randomly by Random.org on or around the 16th.
Enjoy!

Thursday, September 9, 2010

Quilting 101: Fabric

Is this time of year just super chaotic for anyone else? I barely have time to keep up with things here at the homestead let alone on my blog! This post has been on my mind though and I want to get it out there. I have a feeling this is gonna be a long one folks, because when you get a quilter talking about fabric, she can talk, and talk, and talk and talk. Seriously. If you don't make it all the way through this post, I won't blame you.

I love fabric. I mean I love fabric. Especially Moda fabric. As in, I could have our house chalked full of fabric and still not believe that I have enough. It's an addiction, I'll admit it. And really, addictions are not healthy. I won't try to pass it off as o.k. but it's the gosh honest truth. There's just something about the look and feel of good fabric; it invigorates the soul!

Where you buy your fabric doesn't matter as much as the actual quality of it. Quilt shops (whether brick and mortar or online) usually carry good quality fabrics all the time. Stores like JoAnn's, Crafters Warehouse, Hobby Lobby, etc have both good and not so good fabrics. You certainly have to be more picky. Then there's your big box store (no names mentioned) where you should only buy fabric for projects that you A. Don't want to last B. Think you may mess up a lot on so it's really more of a tester than a final.......like my skirt.
I can hear many of you saying right now, "But the good fabric is sooooooo expensive!!" and you're right, it can be. I mean $9/yard? Yikes! It's going to cost you close to $100 just in materials to make that quilt for your bed. So here's my advice for buying fabric:

1. Only buy sale fabric. Websites like Fabric.com have a bunch of quality fabric for way less than other places. The Fat Quarter Shop has sales on their fabrics routinely too. Search the sales section for fabrics that will work and you can end up getting great fabrics for $5/yard. I like to find the fabric that I need and then google it. I can usually always find it for a great price if I spend a little time searching. (If you have an online shop that you love, I'd appreciate you sharing a link in the comments section.)

2. Join a fabric co-op. There is one available to Etsy sellers. You can buy fabrics from retailers like Moda, Free Spirit, Kauffman, Widham, etc. at wholesale. You usually have to buy in somewhat of bulk but if we're talking about making a quilt (or two or three...) then 5 yards of fabric isn't that much.

3. Check out your local quilt shop for special sales, end of bolt deals and frequent buyer benefits.


There's nothing like getting into bed at night and pulling up, over yourself, the quilt that you made. Or, tucking your sweet children in at night with a quilt that your hands made. The thing is, if you're going to invest all the time in making a quilt then you'd better invest in good fabric. It would be a shame to have all of your hard work and time go to waste in 2 years when that quilt falls apart.

Whew, did you make it through? Tomorrow I'm going to try and cover another aspect of fabric. I think you'll like the post....it includes a giveaway too, and that's always good!

Friday, September 3, 2010

Quilting 101: My little introduction

September is here and there is probably no better month to get into quilting. As the fall weather approaches, it turns our minds and our hearts more inward to our homes.
Quilting is the perfect cool weather hobby (once all that canning gets done!) It allows for your creative mind to wander while the rain or snow is falling outside and thoughts of the garden, yard work, trips to the river and backyards BBQ's are a thing of the past.

I'm not sure when I first fell in love with quilts and the art of quilting. My first quilt was made when I was around 9 years old. It was a doll sized quilt that I made to earn a Girl Scout (or Brownie, I can't remember which) badge while in elementary school. I took a little while away from quilting at age 9 *wink* and returned to it at around age 20. The first quilt I made was a queen sized "Square in a Square" quilt because really, I was either going to "go big or go home." A wall hanging didn't interest me in the slightest.

I was blessed at that point to have found the perfect teacher, a lady named Virginia. She was a previous employee of the 2 oral surgeons I was working for at the time in the Sacramento area. A couple of my co-workers and I would meet at Virginia's house every Tuesday night to quilt together. We'd meet, we'd chat , we'd share thoughts and burdens, we'd learn new things from each other and best of all, we'd quilt! Looking back at that now, it was probably one of the most enjoyable times of my early 20's.

If you've read the "About Me" tab on the top of my blog here you'll remember reading that I'm a huge fan of anything 1800-1900. History. US History. My absolute favorite subject in school, and one subject that I still love learning about today. Barbara Brackman has written quite a few books on the subject of history and quilts. One of the first books I owned that she penned was "Civil War Women." I read that book cover to cover so many times. What a delight to read about the women of yesteryear making quilts simply with scraps of fabric, a needle and thread. There is something so uncomplicated about it, something so peaceful.
While today I use my machine and am thankful for it, quilting still tugs at my history heart strings each time I make a new quilt.
And the good news is that quilting is easy! I've always said, "If you can stitch a straight line, you can quilt." While there are quilts that are more complicated, there are thousands that simply require a straight stitch that's available on your home sewing machine. You can make beautiful quilts with a little determination and some dedicated time.

I know that quite a few of my followers are already quilters but I hope this month to be able to inspire both new and old quilter alike. Please follow along this September as we look at, the very special, art of quilting!

Tuesday, August 31, 2010

Canning 101: Labeling

Wow, I just realized that today was the last day of August! Where did this month go?
I wanted to get in one last post on canning; labeling.
It's important to label all of your jars with it's contents and a date after you've completed canning them. This helps with 2 things.
The first, knowing what's actually in your jars. I know, it seems obvious to just look at a jar and know it's contents but trust me, if you can a lot, 10 months from now you may not be able to really tell if that jar is peach pie filling or just canned peaches!? I'm only talking from personal experience here though. ;)
Or second, a jar of jam gets pushed to the back and somehow left. Hmm, this looks like blackberry jam. But I can blackberry jam every year, when is this jar from??
Labeling. Just do it.
photo credit: sweet preservation
You can just take a pen an write on the lid of your jar with all the info or you can get creative and buy or print up some fancy schmancy labels that will wow everyone who sees your jars. I'm going to opt for the pretty labels.
Here are a couple links for pre-made labels that you can print up yourself on your home computer.
So, get down to your office supply store, pick up some blank labels and decorate those jars up real pretty like.
Edit: Dont'cha love it when people comment, you click their name to see if they have a blog and then you find really neat stuff when you read their blogs?
Yep. Just happened to me. Check our Kristina's great post about canning with kids! I loved it!

Friday, August 27, 2010

Canning 101: Jam, the old fashioned way!

I have to admit, I didn't even know you could make jam without pectin. I had found Pomona Pectin a few years ago and was overjoyed that I could use it for jam and not have to add more sugar than actual fruit. Something is just sooooooooo wrong with that.
Then I got my new canning book and it had recipes for, as I call it, old fashioned jam! I guess the thought never occurred to me, "What did people do before pectin?" Well, here's your answer....
Apricot Jam
8c peeled, chopped apricots
4Tb lemon juice
6c sugar
Berry Jam
9 c crushed berries (blackberries, blueberries, raspberries etc.)
6 c sugar
Strawberry Jam
8 c crushed strawberries
6c sugar
In large stainless steel saucepan, combine fruit and sugar (& lemon juice if you're doing apricot.) Bring to a boil over medium heat, stirring constantly to dissolve sugar. Boil, stirring frequently until mixture thickens. Remove from heat and test gel.
Ladle into hot jars leaving 1/4" head space. Place lids and bands and process in hot water bath canner for 10 minutes.
Making jam like this does take a little longer, to make sure enough liquid is evaporated to create a thick enough jam. But if you're out of pectin, you've got fruit that needs attention and a trip to town isn't in sight, then this is a great way to make jam!

Thursday, August 26, 2010

Canning 101: Green Beans

Well, I'm still here canning up more spaghetti sauce today but in a few weeks (once our beans really start coming on) I'll be canning green beans. I love fresh green beans but canned ones come in second. I really, really dislike frozen ones. I don't know what it is about them but they gross me out. So, when we've eaten all the ones we are able to, the rest get canned. All winter long I am so thankful for a cupboard full of canned green beans!
Canning green beans has to be one of the easiest things to can.

Start with your harvested green beans...

Wash them

Snap them into pieces (whichever size you'd like)

Raw pack them into a jar

Add 1tsp of salt (or more to taste) into jar

Fill with jar with water leaving 1" head space

Place lids and bands

Process in a pressure canner for 20 minutes for pint and 25 minutes for quart jars.
Simple, simple, simple! Enjoy!

Wednesday, August 25, 2010

Canning 101: Tomato Sauce and Peach BBQ Sauce

Wow, 40lbs of tomatoes doesn't sound like much but believe me, it is! Especially when you have to get it all done in a day. I'm in the process of canning tomato sauce today using a recipe that Barbara Kingsolver shared on her website. It looked much more simple, and productive, than any in my canning book so I decided to give it a try.My mom SO graciously purchased a new 16qt stock pot for me to make it all in. Thanks Mom! It smells really good! It takes a while to reduce (we're talking hours here people) so I don't have it canned up yet.

I also canned up some "Zesty Peach BBQ Sauce." This is a little twist on conventional sauce because instead of using tomatoes, it uses peaches (which I also have about 40 lbs of!)

Here's the recipe:
Zesty Peach BBQ Sauce

6 cups finely chopped pitted and peeled peaches
1 cup finely chopped seeded red bell pepper
1 cup finely chopped onion
3 tbsp finely chopped garlic
1 1/4 cup honey
3/4 cup cider vinegar
1 tbsp Worcestershire sauce
2 tsp hot pepper flakes
2 tsp dry mustard
2 tsp salt

In a large saucepan combine every everything and bring to a boil. Reduce and stir frequently until it is the thickness of commercial BBQ sauce. About 25 minutes.
In boiling bath canner process for 15 minutes for 1/2 pint jars or 20 for pint jars.
(I took about half of my sauce and put it through the blender to create a smoother, less chunky sauce- but that is up to you on how you'd like the consistency.)

Tuesday, August 24, 2010

Canning 101: Ginger Pear Marmalade

This recipe caught my eye right away in my new canning book. Ginger? Yum. Pears? Yum. Mixed together in a marmalade? I'll take some of that please!

I canned it this morning and this is how it turned out.

It tastes delish! Although mine may have come out a little darker than normal since I almost burnt the pears....oops.

Here's the recipe if you'd like to try it yourself;

3 limes (you can substitute 2 lemons or 1 large orange) I had lemons on hand so that's what I used.
8 c thinly sliced cored peeled firm ripe pears
4 c sugar
3 Tb chopped crystallized ginger
1 1/4c water

Using a sharp knife, remove peel from limes and cut into very thin strips. Set aside. Cut limes in half crosswise and squeeze juice into large stainless steel pan. Add pears. Toss gently until pears are coated with lime juice. Add sugar and ginger. Stir well until combined. Cover and let stand at room temperature for 1 hour.
In small stainless steel pan, combine peel and water. Bring to a boil over medium heat and boil, stirring frequently, until peel is tender and most of the liquid has evaporated, about 15 minutes. Drain liquid into pear mixture; set peel aside.
Bring pear mixture to a full roaring boil over high heat, stirring frequently. Boil hard, continuously stirring (unless you want to risk scorching like me!) for 15 minutes. Add peel and boil until mixture reaches a gel stage, about 5 minutes.
Ladle hot marmalade into hot jars, leaving 1/4" head space. Wipe rim. Place lids and bands on jars. Process for 10 minutes in a hot water bath canner. Wait 5 minutes then remove jars to cool.

I can't wait to try this on a piece of toast. Another thought- a cute label attached to one of these jars would make a great gift to ring in the fall season!

Monday, August 23, 2010

Canning 101: Tomato Puree

What is a gal to do with all the tomatoes in her garden? If you're like me, you just eat them because you hardly get enough to eat fresh thanks to your short, cool growing season. But if you're like most of the other people in the USA, you can them!
Come on, most people can't eat 300lbs of tomatoes fresh anyway. I get mine from a farmer that drives over from the heat area (just about 30 minutes away) and attends our farmers market.

Tomato puree is quick (I mean quick!) and easy and can be used for so many things.
Take your fresh, washed tomatoes, put them in your blender and blend to a nice smooth puree. Yep, we're throwing the tomatoes in whole here- less the stem of course. No blanching, no peeling, nuthin'.
Once you've pureed your tomatoes you're going to want to pour them all into your stock pot and heat to a simmer. Here's the point where you decide how thick or thin you want your puree. Bringing it to a simmer for a few minutes will keep it thin, heating it for a longer period (depending on how juicy your tomatoes were) will reduce it to a thicker puree.
Pour your puree into warm jars, place your lid and band and water bath for 45 minutes. It's that simple!
You can use your puree as a base for tomato soup, spaghetti sauce, pizza sauce, or anything else. We eat a lot of "red soup," as my kids call it, in the winter so this is a quick yummy way to make it for them.
If you're looking for a few more things to do with tomatoes, here are a couple recipes:

BBQ Sauce
8c pureed seeded peeled plum tomatoes
1c pureed seeded green bell peppers
1 c pureed onions
2 cloves garlic, crushed
1 Tb mustard seeds, crushed
1/2 Tb celery salt
1 dried chili pepper, seeded and crushed
3/4 c molasses
3/4 c malt vinegar
1/3 c Worcestershire sauce
2 Tb chili powder
2 tsp pepper
To a large stock pot, add half of the tomato puree. Bring to a roaring boil. While maintaining the boil, add remaining puree. Cook over high heat, stirring frequently, until reduced by half, about 1 hr. Add green pepper, onions, garlic, mustard and celery seeds and chili peppers. Return to a boil and cook apx 10 minutes.
Add remaining ingredients and heat back to medium boil. Stir frequently and cook until desired consistency. For general BBQ sauce consistency, about 45 minutes.
Ladle into hot pint jars leaving 1/2" head space. Place lid and band on jar. Process in hot water bath canner for 20 minutes.

Honeyed Yellow Tomato Butter
5lbs yellow tomatoes, cored and quartered
1 1" piece peeled ginger root
1 Tb whole allspice
2 cinnamon sticks, broken into pieces
2 c sugar
1 c honey
In stock pot crush tomatoes with potato masher. Bring to a boil over medium heat. Reduce heat and boil gently until tomatoes are soft, 20-30 minutes.
Press tomatoes though a food mill or sieve. Discard skin and seeds. Measure 8c of tomato pulp.
Meanwhile, tie ginger root, allspice and cinnamon sticks into cheesecloth, creating a spice bag.
In another pot combine tomato puree, sugar, honey and spice bag. Stir until sugar dissolves. Bring to a boil over medium high heat, stirring frequently. Cook until mixture thickens and mounds on a spoon. Discard spice bag.
Ladle butter into 1/2 pint jars, leaving 1/4" head space. Place lid and band on jars. Process in a hot water bath canner for 10 minutes.
Related Posts with Thumbnails