Monday, February 28, 2011

A Homestead Update

Things around the homestead have been busy, but I've been trying to figure out just what we have been actually doing. The days all seem to run together in the winter as we're stuck inside most of the time. Here's what we've been up to:
1. Thinking of spring. Our Santa Rosa Plum is already starting to bloom and the Shiro is right behind it. The peaches and blueberries have their little buds but the apples and pears won't start to blossom until March or April. I've already ordered my tomato plants from Territorial Seed. While I grow every other vegetable or fruit from seed, I do tomatoes from plants. I've tried the seed and failed- miserably. We have a very short, cool growing season here (from about late May until September- that's just over 4 months) and attempting to get tomatoes from seed just doesn't happen. If everything goes just perfectly then I'm lucky to get tomatoes from the plants.
I decided not to order many seeds this year since I have quite a few left over from last year. I'm hoping that the rain will stop before June this year.2. We are hog free at the moment and it's somewhat strange not to have the pigs here. The homestead doesn't feel complete without them. Gavin and I are trying to decide whether we'll be getting more in April or if we'll wait until August.
3. I'm debating the turkeys.......again. Get them? Not get them? No one really enjoyed having them but they were great for Thanksgiving and Christmas! I'll have to make a decision soon as the chicks will be arriving in just a couple weeks.
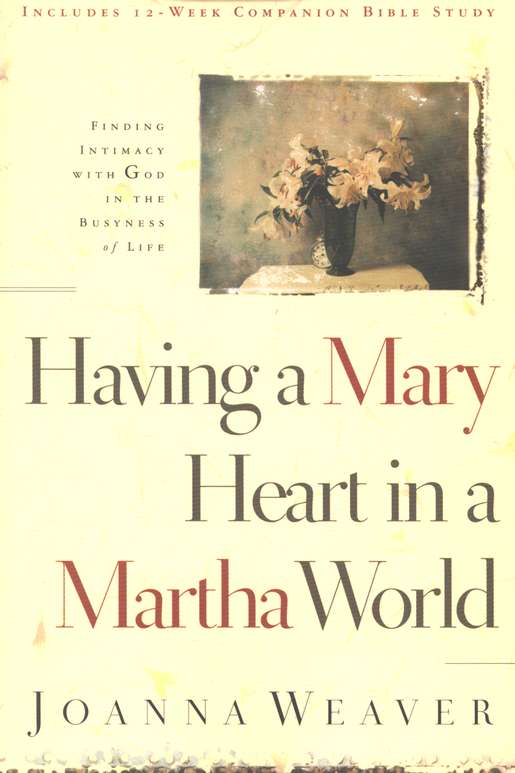
4. I just started a new Bible study with a small group of ladies about a month ago. We reading "Having a Mary Heart in a Martha World." It has a short study, for each chapter, in the back of the book. It has been a great read so far. I was desperately craving a study and this book and our little group of 6 women has been an answer to prayer.

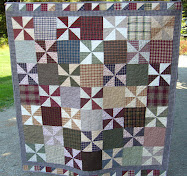
5. Binding quilts. I'm trying! I'm going to plan on sewing the binding onto my quilt today and taking photos of how I do it to share. Have you joined the bind-a-long? How is your quilt binding coming along?
6. We've had to learn to "do without" the past couple of days. My van has a major steering problem that needs to be fixed. It is not safe to drive right now so we're all packed in like sardines into my husbands truck. Our power was out yesterday morning and my husband made a terrific breakfast on the wood stove. Being without lights and an oven is one thing but when our power goes out we also lose water. The pump from the well doesn't work without power. Thankfully, the next place we'll live will be off grid so we won't have to worry about ever losing power. Hopefully.
7. We've also been trying to take advantage of the snow. I'll take the kids during the week and it's fun but not as much fun as when daddy gets to come!

8.Then there's the usual, laundry, housework, chopping fire wood as the wood stove has been going every day, schooling, church, youth groups, taxes, year end paperwork, etc. In other words, life is busy! A very busy blessing.

See what everyone else is up to on their homestead over at the Barn Hop!

Tuesday, February 22, 2011

Homeschool Giveaway Winners

Yes, I said winnerS. I decided to give away two copies of the "Building a Winning Curriculum" from Vision Forum instead of one! So here we go...
Random.org did something this morning that I don't think I've ever seen it do....it selected #1 as one of the numbers. #1!! Most folks think that if they are the #1 commenter, they have a less chance of getting chosen. Why? I don't know. The chances are just the same. I guess just because no one keeps track of how often #27 or #89 is chosen.

Random Integer Generator
Here are your random numbers:

1, 25

Timestamp: 2011-02-19


That means that, Tricia from Mommyx12 and Andi from Declared Unto Him are our winners!
Congratulations! Please email me your mailing info: mountainhomequilts@charter.net

Saturday, February 19, 2011

Butchering the Homestead Hog

Last weekend we butchered our second hog. Having done the same thing only a month and a half before, the process was streamlined and went much smoother this time around. It didn't hurt either that we had some of our best friends here to help us with the process.
We started at about 9am and were finished by 4pm. Everything was cut, wrapped and cleaned up. We did take the bellies and one leg to Taylor's to have them smoke the meat into bacon and ham. Taylor's offers a celery salt cure which is chemically nitrate/nitrite free. There are naturally occurring nitrates in celery salt. While we would like to be able to smoke our own meat and some point (Gavin has a smoker that is out at his parents) we just don't know much about it to feel knowledgeable enough to start. *There's a whole nother homesteading skill I'd like to acquire!*
Here are some pictures of how our day went. Warning: these may be graphic to some, totally normal to others. If you don't like the sight of blood or gutting an animal then please do not proceed.


Getting started: Gavin had already shot the pig and Ida is getting it nice and clean. Timber is looking on.

Gavin digging the hole for the guts. You can just take your guts to the dump but if you have the room on your property to bury them it certainly saves money and time.
Gavin and Rob beginning to gut the hog.
This is what the kids did for the gutting part. They built a fire and played. Once in a while they'd come over to see how it was going. We feel that it's important not only for our children to know where their meat comes from, but to have an appreciation for the animal and to know the work that goes into getting that meat to your table. With grocery stores now a days, I think we are far too removed from how the food we are eating, especially when it comes to meat, got to our plates.
Gutting the hog.
Removing the heart and lungs.
Skinning the hog. Now, most people don't skin hogs, they scald them. We are very new to the process of processing hogs so Gavin has just went with what he knows how to do well from hunting, and that is skinning. We could get the large drum of boiling water and scald it but we haven't ventured there yet. If you have any good tips or experiences with scalding hogs that you can share, pleas do share!


After the guys had skinned it, Ida and I went over the carcass and trimmed as much fat off as we could to make lard.


Removing the forelegs. Ida and I then went into the house and started cutting up meat. The guys continued outside taking the hog apart piece by piece. At that point I got a little sidetracked with it all and forgot to take many more photos!


Our backwoods butcher shop.


Some ribs and one belly reading for wrapping.


We buy butcher's paper at our local hardware store to wrap our meat. We cut the shoulders and one leg into roasts, the bellies go for bacon, the tenderloin, ribs, and chops are cut and wrapped, the other leg goes for smoking, and the rest is ground for use in sausage patties, tacos, etc. I have read a bit about making head cheese but I think my husband is too grossed out about it for me to try. Have any of you ever eaten head cheese? Or made it yourself? What did you think of it?

The Foxfire Book is a fantastic backwoods homesteading book that we've used as reference quite often when it come to butchering hogs. If you don't already own it, I'd recommend investing in it at some point.


If you have any good hog butchering tips or stories, I'd love to hear about them.


Wednesday, February 16, 2011

Bind-A-long; Binding a Quilt- Part 1

Once your quilt is pieced, basted and quilted, you're ready for binding! I'm going to assume that if you've already made a quilt you're fairly familiar with how to use things like your sewing machine, a rotary cutter and mat and ruler so I won't go into any detail there. Here's how I make mine.

You'll first need to calculate how much binding you'll need to make. Measure the perimeter of your quilt. (I'm going to use the numbers from the quilt I am binding to help you in visualizing this.) Take the # of inches you've measured and divide it by 42. That will tell you how many binding strips you'll need to cut. Then take that # and multiply it by the width you'd like your binding. Most people cut between 2" and 2.5" wide strips for their binding, depending on the thickness of your batting and the type of fabric the quilt is made up of. I personally like around 2.25". So, for my quilt:

472" (perimeter)/42" = 11.24" That means I need at least 11.24 strips of binding cut.
11.24" x 2.25" (desired width) = 25.29" That means I need just under 3/4 of a yard of fabric to make my binding.

I'm going to cut 12 strips and then trim off the selvage from each strip. If my # of strips had came out closer to 11.90 I may make sure that I have enough fabric to cut one additional strip, if needed later, bringing the total to 13 instead of 12. We're going to be mitering the corners of our binding and you'll loose a little length in sewing the strips together so we want to be sure our binding isn't going to end up just inches short of completion. It's always better to err on the side of caution here. We're talking 1 extra strip, maybe $0.45 of fabric here folks, don't hesitate to cut an extra one. You can add it to your scrap pile later if you end up not using it.


Once my strips are cut, I'll start sewing. You can sew your strips together with right sides together like this, making a regular straight stitch down, using a 1/4" allowance:


But I prefer to angle my fabric like this and stitch from one corner to the next:
When you're folding the binding over and stitching it, it doesn't leave such a big wad of fabric (from the seam allowance) in one section.
Stitch it on the diagonal, stitching each strip to the previous one. I like to chain piece my biding since it goes quicker but do whatever is comfortable for you. You can also pin this if you feel like it may slip to much while running it through your machine.


Then trim off the little triangle that's left using a 1/4" seam allowance.
Press your seam allowances and then fold your binding in half and press on the fold.
I like to then roll my binding up to keep it tidy until I'm ready to attach it to my quilt.

That's it! Wasn't that simple? You just made your binding- congratulations!

We'll work on sewing the binding on to our quilts in the next post. I'm going to take my time with these how-to posts for 2 reasons. One, to allow ladies who haven't made a binding before to not get left behind. And two, because I am binding a Cal-King quilt and it's just going to take a bit for me to get it done! Maybe I should have started with a table runner. ;)

Remember that if you have any questions you can leave a comment here. I'll answer them here as well just in case someone else has the same question. Or if you need more in depth help, you can email me mountainhomequilts@charter.net.

Tuesday, February 15, 2011

The First EVER Bind-A-Long!

Question: What's wrong with this picture?
Answer: Nothing is wrong with the picture itself, the problem is that it depicts 6 quilts that aren't yet bound! 6? How did I get this deep in? I think it's time to get to binding.

Has anyone ever done a Bind-A-Long? It would be like a Quilt-A-Long but instead of piecing the quilt top together, we'd be binding the quilt. Probably never been done. Mostly because it seems silly. Really, how much fun is binding a quilt? Putting a quilt top together is one thing, but the binding? I usually loathe it- hence the 6 quilts not bound. And that's why I'm going tobe hosting a bind-a-long! No special buttons to put on your blog, no signing up- just bind with us! Get out that quilt that needs to be bound and get it done! Whether you're an experienced quilter or a beginner, it will be encouraging to know that there's a group of ladies working on the same thing you are.
2 of the above quilts have been sitting on my dresser for over 6 months! Do any of you have a quilt like that? Or do you have a quilt that you're just finishing up? Maybe it's your first quilt and you don't know how to do a binding. Help is on the way! Along with the bind-a-long, I'll be posting a tutorial on how to bind a quilt. We'll take it in steps so that you can follow along and bind your quilt with us.

In the next few days I'll be making the binding for one of my quilts (I'm going to start with my largest) and then I'll post the instructions on how to make your own. From there we'll move to attaching the binding to your quilt, and finishing the binding by hand sewing it to the back. I'll give you some alternative methods for binding too in case you'd rather use your machine for the entire project instead of sewing part by hand.

So join in on the fun. Who's with me?

Wednesday, February 9, 2011

1 reason why I homeschool+giveaway*CLOSED*

If you're a follower of my blog then you've probably gotten the impression that I adore Vision Forum. Such great stuff for personal and homeschool use is available on their website and through their catalog. I'm a avid Vision Forum shopper (when money allows of course.) I had ordered the book below to get some inspiration for homeschooling next year. I'll be starting Layton in kindergarten, Timber in preschool and Wyatt in.......9th grade! Yikes!
Wyatt has been attending public school (with 1 year of private school thrown in there around 5th grade) and Gavin and I have decided that next year I will start home schooling him. This has been a decision that I've been praying about for a while. For those of you who don't know already, Wyatt is my stepson. Gavin and I married shortly after his 7th birthday. At that point, I really hadn't given much thought to school. Wyatt went to a public school and that was that. Over the past 4 years though I have begun to think about what I wanted to do for Layton. It has just been a natural progression that I've come to the conclusion that I wanted to homeschool my little kids.
I started to wonder, "What are my little kids going to think about Wyatt going away to school everyday and them staying home?" I guess I just figured I'd have to explain to the little ones that Wyatt had been going there for a long time and there was no sense in pulling him out so late in the game. Then it hit me (don't ask me why it took me so long to realize this) why would I not be willing to send my little kids to government school but I'd feel o.k. sending Wyatt? Why wouldn't I be as vigilant guarding his heart and his mind? I must be crazy!
Of course, it then hit me that I'd be starting homeschooling, beyond preschool, with a high school kid! At that point, fear set in. How am I going to begin in high school?? It sounds much easier to start at kindergarten and work your way up rather than be thrust into a 9th grade curriculum. So I prayed, and prayed and prayed. And Gavin prayed. Was this the right thing to do?
God was so gracious to show me very clearly that homeschooling was indeed what I needed to be doing with Wyatt. From the stories he'd come home with, to the sick to my stomach feeling I'd get when I'd drop him off at school in the morning occasionally. See, Wyatt usually rides the bus to school but once in a while I'll actually drive him there. I realized that not taking him to school directly was making it easier for me. The bus was a crutch. After all, he just got on happy as a lark and then drove away. I wasn't making the direct correlation between him and school. Once I had to actually take him to school, as we drove up and waited in line to drop him off, this heavy knot feeling was welling up in my stomach. I wanted to just keep driving through and not drop him off. I wanted to just say, "You're not going to school there today" as I drove back home.

I am now very excited to be starting high school with him next year. The Lord has really given me a peace about it, a confidence that yes, I can do this!
A terrific little help to me has been the Vision Forum book, "Building a Winning Curriculum." This book puts together ideas and suggestions for you through each subject using the resources available on their web site. I have decided that I will be using this curriculum for Wyatt's history next year and I can't wait to start it!

If you'd like to win a copy of "Building a Winning Curriculum" for yourself, or someone you know that may be new to homeschooling then please follow these rules:

This giveaway is open to everyone!
Giveaway ends February 18th at 8pm PST
For 1 entry, please leave a comment below; any kind of comment is fine.
For a 2nd entry, please Facebook or Tweet about the giveaway and leave another comment telling me that you did
For a 3rd entry, please blog about it and leave another comment telling me that you did
Winner will be drawn randomly by Random.org on or around the 19th.

Wednesday, February 2, 2011

Buck Meat- it's what's for dinner!

Stephany asked if I could chat about venison and how I use it, here on my blog. Sure! I'd be happy to, although unfortunately, I don't think it's going to be blowing many minds.

When it comes to cooking venison we primarily do it 3 ways; roasted, fried and in anything that calls for "ground beef." This year was the first year that I canned it and we have been super happy with the results. The canned meat we use mostly for sandwiches (kind of like you would use tuna.)It is exceptional on a sandwich with lettuce, tomato and cheese! This year was also our first year eating venison roasts. Our normal routine for cutting up buck has been steaks and ground...and that's it, but as I said, we've tried a couple new ways this year and have been very pleased with how it's tasted.
For the roasts: I don't do anything different than I would for a chuck roast, I simply brown the meat in a pan on the stove top and then add a little water, seasoning, cut up potatoes and carrots, pop the lid on and bake.
For fried steaks: I dip the steaks in a egg/milk mixture and then roll them in a seasoned flour mix. I fry them in coconut oil or lard (depending on what I have on hand.)
For ground venison: I use it in pretty much everything, lasagna, hash, spaghetti, hamburgers, tacos, or anything else you need a ground meat for. This was the first year that we ground our venison with added pig fat. In years past, we have just ground it up and used it the same.
For stew: I treat it just as I would a beef stew...and use all the same ingredients. I wish I had some fabulous recipe to share but the truth is that I usually just end up throwing whatever I have on hand into the crock pot and cooking it for hours.
I know that some folks talk about venison being a very lean meat but I haven't personally noticed any different types of preparation needed because of it. Or maybe we just have some fatty black tail around these parts!
A blog I follow just posted this recipe, from a blog that she follows- does all that make sense?- about a great venison recipe. I haven't tried it, but it looks good so give it a go!
Does anyone have a tried and true vension recipe they could share with Stephany (and me?)
Related Posts with Thumbnails