Showing posts with label canning. Show all posts

Tuesday, April 1, 2014

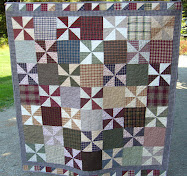
On the Pantry Shelves ~ A Quilt

I don't think that I ever got around to sharing this finished quilt!
 
My friend, Christa, from Cotton Berry Quilts quilted it for me and did such a great job on it. I wish I could take a picture of every single jar to share.
 
Here are a few pictures though...they will have to do.
 
{This is hanging in our bedroom}


I am so happy to have this quilt bound and hanging up.
Thanks Christa, for such a great job. I love this quilt!

Wednesday, September 28, 2011

Cinnamon Vanilla Pear Jam

It's fall and I'm inspired. Inspired to take some of God's goodness and put it to work in my kitchen!
Pumpkin pancakes for breakfast, hot cider on the stove, and cinnamon vanilla pear jam! I purchased 6lbs of pears from Azure this month and went on a internet scavenger hunt to find a recipe for pear jam. I found this one and loved the idea. But you know me, I have to modify and change stuff around so here's what I came up with:

4 c peeled, chopped pears
1.5 c sugar
1 vanilla bean (cut and scraped)
3/4 tsp cinnamon
Pectin
(The following directions are for making this jam using Pomona Pectin. If you use a different type of pectin then just go ahead with all the ingredients in the pot and add your pectin after it's hot.)


Peel and chop your pears. Add the pears, 1c sugar, vanilla bean and scrapings, and cinnamon to large saucepan. Heat till pears become slightly soft. Mash about 1/2 of the pears into a pulp, leaving pear chunks as well.

Add 4tsp calcium water and stir well.

In a bowl, combine remaining 1/2c sugar with 3 tsp powdered pectin. Stir well.

Pour sugar/pectin combo into hot fruit. Stir at medium high heat until well dissolved (about 2 minutes.)

Ladle into half pint jars (or pint if you wish) and process in a hot water bath canner for 10 minutes.


(Just as a note, I did do the original 2 c of sugar in the recipe linked above for my first batch but found it to be too sweet. I lowered it to 1.5c in my second batch and was happier with the results. I believe though that you could lower it even more- to say 1c and still have it turn out great....using the Pomona Pectin that is.)

Simple. Yummy. The perfect fall gift for a friend, at a party, for a neighbor. Enjoy!

This post is linked to the Farmgirl Friday Blog Hop!

Thursday, September 15, 2011

Canning Tuna - A How To

When you live near the coast, you can tuna. You head down to the docks, or talk to one of your fisherman friends (because there are a lot of fishermen here) and you buy a bunch of whole fish. Say, 100-200lbs of it. Then you fillet it. Then you can it.

Pretty simple.


You know where your food comes from (just miles off the coast) and you know how it was processed (at home.) It makes for much happier tuna consumption than the little cans of Bumblebee from the store. Plus, it would take about 5 of those cans to feed my family for lunch. Opening one can is just much easier than opening five. See? I am a tad bit lazy.

So here we go.......


Take your fillet of fish and remove the skin.

Make sure to first cut out all that really dark meat (the blackish, reddish, purplish stuff- it's really fishy.)
Now, if you're a professional fish cutter-upper than you have this down pat. If you're me though, you have some fillets that turn out beautifully...


and then others that just looked hacked to death. But it's o.k., "hacked to death" doesn't matter when you're just cramming the fish into the jar anyway.


Cut your tuna into 2" chunks and pack firmly into clean jars.


Add about 1/4-1/2tsp salt, wipe your rim down, place your lid on, screw on the band and load the jar into the pressure canner.


Your pressure canner should have a couple of inches of water in it, say 2".


Once your canner is full of jars, place the lid on and turn your burner on high. Once the air/steam starts to come out of the top little exhaust hole, turn on your timer for 10 minutes. Once you have allowed all the air to escape, place your bobber thingy (don't you love all my crafty, scientific names for things?) on the exhaust and bring your canner up to pressure. Can at 11lbs of pressure for 100 minutes for pint jars. When 100 minutes is up, simply turn your burner off and allow the canner to reduce it's pressure on it's own. DO NOT remove the bobber thingy until all pressure is gone!


The whole process of canning, once your jars are in the canner, takes about 2 hours with all the heating up and cooling down. I try to can as much as possible at one time so that I'm not at the stove all day long.


Really, canning tuna is easy and fun! Have you ever had home canned tuna? Questions? Comments? :)

This post is linked to the Barn Hop!

Thursday, August 18, 2011

the busiest time of the year

The end of summer. Fall. It's the busiest time around here- even putting spring to shame. Harvesting the garden is busier, in my opinion, than planting it. I spent an hour and a half yesterday harvesting green beans alone. Then I spent another couple of hours snapping, filling jars and canning. With the help of my trusty homemaker in training, my daughter.


But it's just not the garden, it's getting ready for the school year, putting together our daily schedule, making sure that I have all the curriculum that I need. And what's more? Hunting season has already begun! Well, bow season at least. And in just 4 more weeks, rifle season opens.


I'm also feeling nesty lately. No, I'm not pregnant....although I would love to be. Maybe it's the other baby we have around here now....


Meet Miss Oakley. She's a Cane Corso (Italian Mastiff) and she's 12 weeks old. She likes squeaky toys, chewing on anything and brief walks. She's loyal to her family and loves lying around.

I haven't had a puppy in over 12 years. All the work though is now coming back to me. While I'm still loving her puppy breath, all the loose skin, and the way her ears flop around while she runs, I'll be happy when the housebreaking, chewing on the furniture (good thing it's all second hand) stage is over.

Ah summer, I'm glad you're still here for a little while longer. A few more trips to the river, a few more BBQ's, I'm going to hold onto as much sunshine as I can now because I know the rain will be here all too soon!

What's your busiest season where you live?

Tuesday, August 16, 2011

It's Tuna Time

The Tuna is just starting to come into the harbor this year. Getting fresh from the ocean Tuna is one of the many blessings of living near the coast. And because we're mountain folk, backwoods, okie-like, this is how we do it- outside, on the plywood, away from the house.


The kids had more fun than they should have with the fish. Ya know, the usual poking of the eyes and slapping the mouth open and shut to make the fish "chomp down."
My wonderful mountain man of a husband is a pro at cutting up any animal- including fish.
I'll be canning this later this month. For right now though, since other things are so busy, the Tuna is in the freezer.

In other boon-dock news, we have another bear. No matter how many we kill off.... I mean... "drive away," they still come back. The bear was here a couple weeks ago, dumpster diving. But the other night he/she did something that put a price on it's head. Too bad the Beekeeping book doesn't have a "What to do in case of bear attack" section.


I'm going to try and reconstruct as much of the hive as possible and then wait up with the 300 Wetherby until the bear comes back.

Saturday, January 1, 2011

Happy New Year and a December Recap

Happy New Year to you all! I pray that God blesses you abundantly this 2011!

December has been a super busy month for us and I, obviously, only blogged twice the entire month! Here's a quick re-cap of what went on at our homestead in December.

We started the month finding our tree and getting ready for Christmas. We gave away a lot of handmade gifts this year which included canned goods, like applesauce and jams along with homemade soaps. The older boys love to help make applesauce. I think it's the peeler/corer tool. If you don't have one of these, invest in one and watch your children enjoy helping with ever last apple!

We also spent a lot of time baking. Seriously.


On our holiday baking list this year were, Gingerbread cookies, peppermint brownies, raspberry jam thumbprint cookies, peanut butter and chocolate truffles, mexican wedding cakes, cranberry snow candy, black bottom cupcakes and yes, more gingerbread cookies! We even had a day where we decorated gingerbread with some friends.

Our animal count, here on the homestead, dropped by three this month. One was unplanned and sad, the other two were planned and worked out great. The first, unplanned one was having to say goodbye to one of our dogs. He was 13 and I'd had him since he was 6wks old. We had found out in October that he had bone cancer in his left foreleg. Just before Christmas he was barely walking and we decided that it was time to put him down. My eyes still well up at the thought of that day but I am glad that he is out of pain now.


Our two other planned losses were a rooster (we had two and only have 8 hens!) and one of our hogs.
After butchering the turkeys last month, I have to say this chicken was CAKE! It went super fast and easy. Maybe starting off with a big bird is the way to go- it makes everything else seem like child's play. We ate him (our first home raised chicken) 2 nights later. While he was young, (only about 7months old) his thighs were a little tough but everything else on him was great. Since he was a Buff Orphington, his breasts weren't as large as you'd find on a meat chicken but still turned out all right.
Our hog experience was slightly.... a mess. I'll spare you the details and any photos. This was our first home raised, home butchered hog. Gavin did it on one of the worst days of our most recent storm. We'll be butchering our other hog at the end of January. Hopefully the weather will be better and the process will go more smoothly. I'll share shots of that one later. But for now, there's one hog in the freezer!

A special little someone turned 4 this month and we also celebrated both my Dad's and my MIL's birthday.


Layton is a big boy now so he gets to cut his own cake!


He was thrilled to get his very fist gun this year. A Daisy pellet gun. He's been out back shooting a couple times a week trying to improve his aim. For just turning 4, I'd say he does pretty well.


Mason has taken to reading all the books he can get his hands on. Well, maybe not really reading, but at least pretending to. We read through "The Courage of Sarah Noble" as a family in the evenings. While it is a book geared towards 3rd or 4th graders, even my 8th grader was eagerly waiting to hear "what happens next" each night.

Christmas was a blessing. We enjoyed the time together as a family and of course, attempted to snap another family picture. Ya know, one where everyone is smiling at the same time and all looking at the camera? This one didn't turn out too bad I suppose.

One great thing about winter? Being forced to be indoors. Not that I enjoy having to be inside all the time. Actually, I'd much rather spend my time outside but with all the rain and hail and storms we've been having, inside time allows for more inside tasks....including quilting! I've been trying to work on a few quilts here and there and I'm proud to say that I'm actually making progress. Being cooped up also allows more time for reading. Another favorite past time of mine. Do you enjoy reading? Would you like to have another book added to your collection to read through this winter? Well, if you've actually stayed with me though this entire post then you're more than entitled to entering the giveaway for "Country Wisdom and Know How." Really, if you've made it through all of this I wish I could just give each of you a copy for being so faithful! But I only have one to give away so here we go:

Here's a brief description: "Reminiscent in both spirit and design of the beloved Whole Earth Catalog, Country Wisdom Know-How is an unprecedented collection of information on nearly 200 individual topics of country and self-sustained living. Compiled from the information in Storey Publishing's landmark series of "Country Wisdom Bulletins," this book is the most thorough and reliable volume of its kind. Organized by general topic including animals, cooking, crafts, gardening, health and well-being, and home, it is further broken down to cover dozens of specifics from "Building Chicken Coops" to "Making Cheese, Butter, and Yogurt" to "Improving Your Soil" to "Restoring Hardwood Floors." Nearly 1,000 black-and-white illustrations and photographs run throughout and fascinating projects and trusted advice crowd every page."

Rules:
This giveaway is open to everyone!
Giveaway ends January 15th at 8pm PST
For 1 entry, please leave a comment below; any kind of comment is fine.
For a 2nd entry, please Facebook or Tweet about the giveaway and leave another comment telling me that you did
For a 3rd entry, please blog about it and leave another comment telling me that you did
Winner will be drawn randomly by Random.org on or around the 16th.
Enjoy!

Monday, October 4, 2010

the UPS man's tomatoes

We love our UPS man. We'll call him G. He comes by our house quite often. When you live near nothing, you shop online a lot. Especially for fabric. (Let's keep that between you and me though.)
When G drove up today I thought to myself, "Why is he here? I didn't order anything, did I?" I see him walk off his truck with a diapers.com box. Hm, o.k., I still don't remember ordering anything. I go outside to greet him and guess what he has for me? This...

He grows more tomatoes than they can eat so he figured he share the wealth. Sweet. And G and his wife just had a new baby boy, so that explains the diapers.com box.
Can you guess what I spent my day doing?
We are truly blessed in our community to have great friends!

Thursday, September 30, 2010

what in the world?

Have you ever had one of those days where you were asking yourself "What in the world?" as the day progressed? That was me, yesterday. Here's why.
First, our carrots. What's up with them this year? I picked about 10 yesterday and over half of them weighed more than 1 pound.....each.Seriously? How do carrots get this big? In a normal sense, I mean. This seed was just planted in May, it's not as if the carrots have been in the ground for a year!Next, green beans. I swear that I packed all the jars the same and yet one came out looking like this. As if some little critter got into the jar in the pressure canner, drank half the water and ate about 1/4 of the green beans. How did that happen?Finally, eggs. More specifically turkey eggs. How many do they lay? I read somewhere, I thought, that a turkey may only lay one egg in their lifetime. Really? Is that true? Well, we got one yesterday. It's the egg in the middle. Has anyone ever eaten a turkey egg? I'd suppose they are about the same as chicken eggs. For some reason though I have this idea that I'll crack it open and something hideous will be lurking inside. Kinda scary.

Wednesday, September 15, 2010

why friends are good

Friends are good for lots of things (lots and lots) but this is just one of the reasons why....


Peaches. 54 pounds of peaches. Canned the other day.

Since canning only happens, for the most part, one season a year, I often forget how much fun it is to can with a friend. Not only does it go way faster but it's a much more joyful process. We made jam, lots of jam, and we canned peaches up for savoring this winter. We talked and we laughed and we just had fun.

Today I was in the kitchen again canning up sweet pickles for my dear hubby. He loves them on tuna. (Insert gagging sound here.) Later this month we'll be canning tuna, and my entire house will be smelling like fish. Unless I break out the propane cooker standy thing- I really can't remember the proper name right now, sorry about that. I will certainly be recruiting hubby to help with all of that. Maybe even my mother-in-law too. After all, canning a bunch of stinky fish just isn't as much fun flying solo.

Do you usually can by yourself or can alone? Do you have any type of annual ritual with canning? Maybe all your family gets together to do it or you have a special friend that you always can green beans with?

Don't forget about the charm pack giveaway here! The giveaway ends on the 17th!

Tuesday, August 31, 2010

Canning 101: Labeling

Wow, I just realized that today was the last day of August! Where did this month go?
I wanted to get in one last post on canning; labeling.
It's important to label all of your jars with it's contents and a date after you've completed canning them. This helps with 2 things.
The first, knowing what's actually in your jars. I know, it seems obvious to just look at a jar and know it's contents but trust me, if you can a lot, 10 months from now you may not be able to really tell if that jar is peach pie filling or just canned peaches!? I'm only talking from personal experience here though. ;)
Or second, a jar of jam gets pushed to the back and somehow left. Hmm, this looks like blackberry jam. But I can blackberry jam every year, when is this jar from??
Labeling. Just do it.
photo credit: sweet preservation
You can just take a pen an write on the lid of your jar with all the info or you can get creative and buy or print up some fancy schmancy labels that will wow everyone who sees your jars. I'm going to opt for the pretty labels.
Here are a couple links for pre-made labels that you can print up yourself on your home computer.
So, get down to your office supply store, pick up some blank labels and decorate those jars up real pretty like.
Edit: Dont'cha love it when people comment, you click their name to see if they have a blog and then you find really neat stuff when you read their blogs?
Yep. Just happened to me. Check our Kristina's great post about canning with kids! I loved it!

Friday, August 27, 2010

Canning 101: Jam, the old fashioned way!

I have to admit, I didn't even know you could make jam without pectin. I had found Pomona Pectin a few years ago and was overjoyed that I could use it for jam and not have to add more sugar than actual fruit. Something is just sooooooooo wrong with that.
Then I got my new canning book and it had recipes for, as I call it, old fashioned jam! I guess the thought never occurred to me, "What did people do before pectin?" Well, here's your answer....
Apricot Jam
8c peeled, chopped apricots
4Tb lemon juice
6c sugar
Berry Jam
9 c crushed berries (blackberries, blueberries, raspberries etc.)
6 c sugar
Strawberry Jam
8 c crushed strawberries
6c sugar
In large stainless steel saucepan, combine fruit and sugar (& lemon juice if you're doing apricot.) Bring to a boil over medium heat, stirring constantly to dissolve sugar. Boil, stirring frequently until mixture thickens. Remove from heat and test gel.
Ladle into hot jars leaving 1/4" head space. Place lids and bands and process in hot water bath canner for 10 minutes.
Making jam like this does take a little longer, to make sure enough liquid is evaporated to create a thick enough jam. But if you're out of pectin, you've got fruit that needs attention and a trip to town isn't in sight, then this is a great way to make jam!

Thursday, August 26, 2010

Canning 101: Green Beans

Well, I'm still here canning up more spaghetti sauce today but in a few weeks (once our beans really start coming on) I'll be canning green beans. I love fresh green beans but canned ones come in second. I really, really dislike frozen ones. I don't know what it is about them but they gross me out. So, when we've eaten all the ones we are able to, the rest get canned. All winter long I am so thankful for a cupboard full of canned green beans!
Canning green beans has to be one of the easiest things to can.

Start with your harvested green beans...

Wash them

Snap them into pieces (whichever size you'd like)

Raw pack them into a jar

Add 1tsp of salt (or more to taste) into jar

Fill with jar with water leaving 1" head space

Place lids and bands

Process in a pressure canner for 20 minutes for pint and 25 minutes for quart jars.
Simple, simple, simple! Enjoy!

Wednesday, August 25, 2010

Canning 101: Tomato Sauce and Peach BBQ Sauce

Wow, 40lbs of tomatoes doesn't sound like much but believe me, it is! Especially when you have to get it all done in a day. I'm in the process of canning tomato sauce today using a recipe that Barbara Kingsolver shared on her website. It looked much more simple, and productive, than any in my canning book so I decided to give it a try.My mom SO graciously purchased a new 16qt stock pot for me to make it all in. Thanks Mom! It smells really good! It takes a while to reduce (we're talking hours here people) so I don't have it canned up yet.

I also canned up some "Zesty Peach BBQ Sauce." This is a little twist on conventional sauce because instead of using tomatoes, it uses peaches (which I also have about 40 lbs of!)

Here's the recipe:
Zesty Peach BBQ Sauce

6 cups finely chopped pitted and peeled peaches
1 cup finely chopped seeded red bell pepper
1 cup finely chopped onion
3 tbsp finely chopped garlic
1 1/4 cup honey
3/4 cup cider vinegar
1 tbsp Worcestershire sauce
2 tsp hot pepper flakes
2 tsp dry mustard
2 tsp salt

In a large saucepan combine every everything and bring to a boil. Reduce and stir frequently until it is the thickness of commercial BBQ sauce. About 25 minutes.
In boiling bath canner process for 15 minutes for 1/2 pint jars or 20 for pint jars.
(I took about half of my sauce and put it through the blender to create a smoother, less chunky sauce- but that is up to you on how you'd like the consistency.)

Tuesday, August 24, 2010

Canning 101: Ginger Pear Marmalade

This recipe caught my eye right away in my new canning book. Ginger? Yum. Pears? Yum. Mixed together in a marmalade? I'll take some of that please!

I canned it this morning and this is how it turned out.

It tastes delish! Although mine may have come out a little darker than normal since I almost burnt the pears....oops.

Here's the recipe if you'd like to try it yourself;

3 limes (you can substitute 2 lemons or 1 large orange) I had lemons on hand so that's what I used.
8 c thinly sliced cored peeled firm ripe pears
4 c sugar
3 Tb chopped crystallized ginger
1 1/4c water

Using a sharp knife, remove peel from limes and cut into very thin strips. Set aside. Cut limes in half crosswise and squeeze juice into large stainless steel pan. Add pears. Toss gently until pears are coated with lime juice. Add sugar and ginger. Stir well until combined. Cover and let stand at room temperature for 1 hour.
In small stainless steel pan, combine peel and water. Bring to a boil over medium heat and boil, stirring frequently, until peel is tender and most of the liquid has evaporated, about 15 minutes. Drain liquid into pear mixture; set peel aside.
Bring pear mixture to a full roaring boil over high heat, stirring frequently. Boil hard, continuously stirring (unless you want to risk scorching like me!) for 15 minutes. Add peel and boil until mixture reaches a gel stage, about 5 minutes.
Ladle hot marmalade into hot jars, leaving 1/4" head space. Wipe rim. Place lids and bands on jars. Process for 10 minutes in a hot water bath canner. Wait 5 minutes then remove jars to cool.

I can't wait to try this on a piece of toast. Another thought- a cute label attached to one of these jars would make a great gift to ring in the fall season!

Monday, August 23, 2010

Canning 101: Tomato Puree

What is a gal to do with all the tomatoes in her garden? If you're like me, you just eat them because you hardly get enough to eat fresh thanks to your short, cool growing season. But if you're like most of the other people in the USA, you can them!
Come on, most people can't eat 300lbs of tomatoes fresh anyway. I get mine from a farmer that drives over from the heat area (just about 30 minutes away) and attends our farmers market.

Tomato puree is quick (I mean quick!) and easy and can be used for so many things.
Take your fresh, washed tomatoes, put them in your blender and blend to a nice smooth puree. Yep, we're throwing the tomatoes in whole here- less the stem of course. No blanching, no peeling, nuthin'.
Once you've pureed your tomatoes you're going to want to pour them all into your stock pot and heat to a simmer. Here's the point where you decide how thick or thin you want your puree. Bringing it to a simmer for a few minutes will keep it thin, heating it for a longer period (depending on how juicy your tomatoes were) will reduce it to a thicker puree.
Pour your puree into warm jars, place your lid and band and water bath for 45 minutes. It's that simple!
You can use your puree as a base for tomato soup, spaghetti sauce, pizza sauce, or anything else. We eat a lot of "red soup," as my kids call it, in the winter so this is a quick yummy way to make it for them.
If you're looking for a few more things to do with tomatoes, here are a couple recipes:

BBQ Sauce
8c pureed seeded peeled plum tomatoes
1c pureed seeded green bell peppers
1 c pureed onions
2 cloves garlic, crushed
1 Tb mustard seeds, crushed
1/2 Tb celery salt
1 dried chili pepper, seeded and crushed
3/4 c molasses
3/4 c malt vinegar
1/3 c Worcestershire sauce
2 Tb chili powder
2 tsp pepper
To a large stock pot, add half of the tomato puree. Bring to a roaring boil. While maintaining the boil, add remaining puree. Cook over high heat, stirring frequently, until reduced by half, about 1 hr. Add green pepper, onions, garlic, mustard and celery seeds and chili peppers. Return to a boil and cook apx 10 minutes.
Add remaining ingredients and heat back to medium boil. Stir frequently and cook until desired consistency. For general BBQ sauce consistency, about 45 minutes.
Ladle into hot pint jars leaving 1/2" head space. Place lid and band on jar. Process in hot water bath canner for 20 minutes.

Honeyed Yellow Tomato Butter
5lbs yellow tomatoes, cored and quartered
1 1" piece peeled ginger root
1 Tb whole allspice
2 cinnamon sticks, broken into pieces
2 c sugar
1 c honey
In stock pot crush tomatoes with potato masher. Bring to a boil over medium heat. Reduce heat and boil gently until tomatoes are soft, 20-30 minutes.
Press tomatoes though a food mill or sieve. Discard skin and seeds. Measure 8c of tomato pulp.
Meanwhile, tie ginger root, allspice and cinnamon sticks into cheesecloth, creating a spice bag.
In another pot combine tomato puree, sugar, honey and spice bag. Stir until sugar dissolves. Bring to a boil over medium high heat, stirring frequently. Cook until mixture thickens and mounds on a spoon. Discard spice bag.
Ladle butter into 1/2 pint jars, leaving 1/4" head space. Place lid and band on jars. Process in a hot water bath canner for 10 minutes.

Sunday, August 22, 2010

Canning Book Giveaway Winner!

We're finally waking up to a sunny morning here in this county! Thank you Lord! I think the Lord made it sunny today just to celebrate His glorious day! (We haven't seen the sun this early in about 2 months.) Anywho, let's get on with the drawing. Random.org was nice to me this morning and didn't make it difficult to count- thanks. Here we go.....

Random Integer Generator
Here are your random integers, generated with replacement:

68
Timestamp: 2010-08-22 6:53:59

That means that : Tumbleweeds and Twisters is our winner! Congratulations, I hope you love this book!

Thursday, August 12, 2010

Canning 101: Hot Packing and Headspace

I want to quickly cover 2 issues that come up with canning. The first is hot packing.

photo:dutchblitz

Many vegetables are able to be raw packed (since they are usually processed in a pressure canner) but most fruits require a hot pack. Why is this?
"Many fresh foods contain from 10-30 percent air. How long canned foods retain high quality depends on how much air is removed from food before the jars are sealed."
When you fail to hot pack your fruits you can end up with quite a bit of space in the bottom of your sealed jar as your fruit floats up at the top. Sometimes even as much as half the jar ends up being space instead of fruit!
To hot pack fruit, simmer it in boiling water for 2-5 minutes. With fruits such as peaches you can use that same water to create the syrup you add to the jars before processing. Pack your peaches well. You don't have the squish them all down into a peachy pulp but make sure you're utilizing as much jar space as possible. An added bonus, hot packed foods also retain better color and flavor over time.

photo:flowersandsausages

Secondly, head space. "Head space" refers to the space above the food in a jar and below the lid. A general rule for head space is:
1/4" for jams and jellies
1/2" for fruits and tomatoes, processed in a HWB
1" for low acid foods, processed in a pressure canner
Head space is essential in jars to allow for the expansion of foods during processing and for forming the vacuum in cooled jars.
Foods canned in a pressure canner need more head space because as the temperature gets higher the air expands more.

I hope that some of this is helpful to those just starting to can or those that always wondered why their peaches always floated to the top. ;)

Don't forget to enter my canning book giveaway here!

Related Posts with Thumbnails