Wednesday, March 26, 2014
An Overdue Update
Saturday, January 1, 2011
Happy New Year and a December Recap

We also spent a lot of time baking. Seriously.

On our holiday baking list this year were, Gingerbread cookies, peppermint brownies, raspberry jam thumbprint cookies, peanut butter and chocolate truffles, mexican wedding cakes, cranberry snow candy, black bottom cupcakes and yes, more gingerbread cookies! We even had a day where we decorated gingerbread with some friends.
Our animal count, here on the homestead, dropped by three this month. One was unplanned and sad, the other two were planned and worked out great. The first, unplanned one was having to say goodbye to one of our dogs. He was 13 and I'd had him since he was 6wks old. We had found out in October that he had bone cancer in his left foreleg. Just before Christmas he was barely walking and we decided that it was time to put him down. My eyes still well up at the thought of that day but I am glad that he is out of pain now.

Our two other planned losses were a rooster (we had two and only have 8 hens!) and one of our hogs.
After butchering the turkeys last month, I have to say this chicken was CAKE! It went super fast and easy. Maybe starting off with a big bird is the way to go- it makes everything else seem like child's play. We ate him (our first home raised chicken) 2 nights later. While he was young, (only about 7months old) his thighs were a little tough but everything else on him was great. Since he was a Buff Orphington, his breasts weren't as large as you'd find on a meat chicken but still turned out all right.
Our hog experience was slightly.... a mess. I'll spare you the details and any photos. This was our first home raised, home butchered hog. Gavin did it on one of the worst days of our most recent storm. We'll be butchering our other hog at the end of January. Hopefully the weather will be better and the process will go more smoothly. I'll share shots of that one later. But for now, there's one hog in the freezer!
A special little someone turned 4 this month and we also celebrated both my Dad's and my MIL's birthday.

Layton is a big boy now so he gets to cut his own cake!

He was thrilled to get his very fist gun this year. A Daisy pellet gun. He's been out back shooting a couple times a week trying to improve his aim. For just turning 4, I'd say he does pretty well.

Mason has taken to reading all the books he can get his hands on. Well, maybe not really reading, but at least pretending to. We read through "The Courage of Sarah Noble" as a family in the evenings. While it is a book geared towards 3rd or 4th graders, even my 8th grader was eagerly waiting to hear "what happens next" each night.
Christmas was a blessing. We enjoyed the time together as a family and of course, attempted to snap another family picture. Ya know, one where everyone is smiling at the same time and all looking at the camera? This one didn't turn out too bad I suppose.
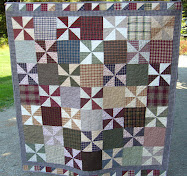
One great thing about winter? Being forced to be indoors. Not that I enjoy having to be inside all the time. Actually, I'd much rather spend my time outside but with all the rain and hail and storms we've been having, inside time allows for more inside tasks....including quilting! I've been trying to work on a few quilts here and there and I'm proud to say that I'm actually making progress. Being cooped up also allows more time for reading. Another favorite past time of mine. Do you enjoy reading? Would you like to have another book added to your collection to read through this winter? Well, if you've actually stayed with me though this entire post then you're more than entitled to entering the giveaway for "Country Wisdom and Know How." Really, if you've made it through all of this I wish I could just give each of you a copy for being so faithful! But I only have one to give away so here we go:
Here's a brief description: "Reminiscent in both spirit and design of the beloved Whole Earth Catalog, Country Wisdom Know-How is an unprecedented collection of information on nearly 200 individual topics of country and self-sustained living. Compiled from the information in Storey Publishing's landmark series of "Country Wisdom Bulletins," this book is the most thorough and reliable volume of its kind. Organized by general topic including animals, cooking, crafts, gardening, health and well-being, and home, it is further broken down to cover dozens of specifics from "Building Chicken Coops" to "Making Cheese, Butter, and Yogurt" to "Improving Your Soil" to "Restoring Hardwood Floors." Nearly 1,000 black-and-white illustrations and photographs run throughout and fascinating projects and trusted advice crowd every page."
Rules:
This giveaway is open to everyone!
Giveaway ends January 15th at 8pm PST
For 1 entry, please leave a comment below; any kind of comment is fine.
For a 2nd entry, please Facebook or Tweet about the giveaway and leave another comment telling me that you did
For a 3rd entry, please blog about it and leave another comment telling me that you did
Winner will be drawn randomly by Random.org on or around the 16th.
Enjoy!
Thursday, July 29, 2010
Soap Making 101: A couple recipes
The giddiness will probably last through the month of August (good for all of you) and die off somewhere in September when I still have 6 bushells of green beans and 50lbs of apples to can.
But for now, it is still July, right? So let's get to a couple recipes for soap so that you can make your own. (If you haven't already looked up recipes and tried them after getting tired of waiting on me!)

First, I found this recipe on the internet and while I haven't yet tried it, I SO want to. My problem is that I have about 40 bars of soap in my laundry room waiting to be used and hubby would probably frown on me making yet another batch so soon. I will be doing this recipe though at my next batch!
Oatmeal and Honey Soap
32 oz. cold water (4 cups)
12 oz. lye
2 oz. beeswax (melt with fats)
4 pounds lard (64 oz.)
12 oz. olive oil
8 oz. coconut oil
4 oz. cocoa butter
Add at trace:
2 T. - 1/4 cup honey
1 - 2 T. bitter almond fragrance oil (you might prefer to use some cinnamon oil and/or ground cinnamon, or clove oil)
1 cup rolled oats
Just a note* this recipe said that it was for a 7lb loaf. So don't go trying to fit in your 5lb loaf!
**ALSO! Since I render my own lard, I don't need to buy it but if you don't have access to a bunch of pig fat then you can buy lard. I actually have seen it at both of our grocery stores Ray's and Safeway. It's in a green and white box (or bucket) with LARD written in red.**
Here's what I generally use for soap:
Homestead Soap
10 oz water
9 oz goats milk (or you can just use another liquid or water entirely)
8.1 oz lye
2.3 oz shea butter
14.8 oz coconut 76
16.1 oz palm oil
7.8 oz canola oil
6.6 oz apricot kernel or sweet almond oil
9.8 oz olive oil
Add at trace:
2 oz fragrance oil
Any additives such as an exfloiator
If you try either of these I'd love to hear about how it all came out!
Friday, July 23, 2010
Soap Making 101: Molds
Plastic molds work too. They are less expensive than wooden ones. I've even seen folks use a plastic storage container or square plastic bucket for molding their soap. Make sure that your plastic is bendable though. When your soap starts to harden you're going to want to be able to pop it out of the mold. (Think getting ice cubes out of the ice cube tray.)
Here are a couple links for some molds:
Link 1
Link 2
You can google more if you'd like.
If you'd like to be frugal then go through your attic or your storage and find something that will work. You can also build your very own wooden soap mold. A friend of mine has her husband build hers and they are great!
Here are a couple links for making your own:
Link 1
Link 2
Wednesday, July 21, 2010
Soap Making 101: Exfoliators

Here is a fun list of some of the additives you can use to create an exfoliating bar of soap.
Oats
Are there any others you can think up? Really, you can add almost anything to your bar!
Sunday, July 18, 2010
Soap Making 101: A Tutorial
Step 1: Gather all of your supplies. You’re going to need:
*A digital scale
*A mold and some parchment paper or oil to line it with
*Your safety equipment
*Your ingredients
*A stick blender
*Wooden or metal spoons and a spatula
*2 pots, one for mixing lye and one for mixing oils. I use a saucepan for the lye and a larger stock pot for the oils. It’s always recommended that whatever pots you use, you use exclusively for soap making. Checking your local thrift store can turn up some inexpensive pots to use in soap making.
*Vinegar, on hand in case you get any lye on yourself or the counter (vinegar will neutralize the lye.)
Step 2: Carefully measure out your liquid. For the soap in these pictures I used a mix of water and fresh goat’s milk. It’s best to measure your ingredients on an accurate digital scale. This will ensure that you are using just the right amounts of ingredients and that your soap turns out well. Once you measure your liquids then pour them into a large saucepan. Next, measure out your lye. Here is where your safety gear is going to come in. Make sure you have on your gloves when you measure.

Step 3: We’re going back indoors now to measure and melt down our oils and fats. Again, using your digital scale, measure out each of your oils. You’re going to start with your solid oils first. Coconut oil, palm oil, shea butter, lard, are some examples of solid oils. They are solid at room temperature. Place your measured solid oils into a stock pot and slowly heat on your stove top. You want to do this at a low heat setting. After your solids have melted down into liquids you can measure the liquid oils and add them into the pot. Stir well. Continue to heat, on low, until your oil combination is clear. Once your oils are melted, remove the pot from the stove and allow to cool on the counter.
Step 4: While your oils are cooling, you can take the time to line your mold. I use a wooden mold so I line mine with parchment paper. Wax paper works as well. If you’re using a plastic mold then you can just grease your mold with something like coconut oil. Just make sure you grease it well. When lining your mold you want to make sure that you cover all of the surfaces. This is not an easy task. As you make more and more soap though, it will become easier. You’ll get a method down and it won’t take too long.

Step 5: Once your lye has cooled down enough (a good rule of thumb is you should be able to comfortably hold your hand on the side of the saucepan) you can bring it back inside. Carefully pour your lye mixture into your stock pot of oils (which should have also cooled down by now.) Take your stick blender and start mixing the lye and oils together. Please make sure that you have your stick blender in the mixture before turning it on or off. Otherwise, you are going to get lye flying everywhere. As you mix your lye and oils the mixture will being to thicken. Most times it takes about 3-4 minutes of mixing to get the combination to trace. Tracing is where the mix becomes thick enough that you can see a trail or a wake in the pot. Once your mix starts to trace, you want to stop mixing. If you continue, the mixture can become so thick that you won’t be able to pour it into your mold. As soon as your mix starts to trace you have the option of adding in any fragrance or other additives. For the soap pictured here I added oats and essential oil when it began to trace. Then mix the additives in just enough to combine them into the soap mix.

Step 6: Now you’re ready to pour. Pour your soap carefully into your mold, scraping all the soap out of the pot with a spatula, and set your mold somewhere that it won’t be disturbed for 12-24 hours.
Step 7: After 24-36 hours of your soap setting up you can remove the mold and cut up your bars. A large kitchen knife works well but if you want to get decorative you can buy a special cutter that leaves a crinkle like look on your soap. Set your bars somewhere out of the way and space your bars out so that air can circulate around them.

Step 8: Wait. 4-6 weeks. The longer you wait the harder your bar will become. The harder your bar, the longer it will last in the shower or bath. I would recommend waiting at least the 4 weeks though to ensure that the sponification has done it’s job and all of the lye is safely removed from your soap.
Step 9: Get into the shower and enjoy!
Saturday, July 10, 2010
Soap Making 101: Safety
The biggest fear that folks always share with me about why they haven't (or won't) make their own soap has to do with the lye.I'm not going to belittle lye or pretend as though it is a completely safe product. It is dangerous to breathe and to touch. If you take a few simple precautions though you can make soap safely!
Here are the three things you are going to need:
1. A chemical mask
2. Chemical gloves
3. Goggles
All of the above can be found at your local hardware store, Home Depot, Wal-Mart, etc. for under $10. And spending $10 to keep yourself safe is worth it! The mask is going to help with the vapors that rise. (I try and stand back as far as possible when mixing and turn my head the other way so that I'm breathing clean air.) The gloves are going to protect your hands and lower arms from any possible splashes that can burn you. The goggles protect your eyes the same way.

Another tip on keeping yourself safe while soaping is to do as much as you can outside. For those of you that are blessed with an outdoor kitchen, that is the place you want to make your soap! For the rest of us, we can at least mix our liquid and lye outside so that the vapors that come up from the pot are swiftly swept away and do the rest of our soaping indoors.
I always mix my liquid and lye outside- even in so-so weather. As long as it's not pouring down rain, you can work outside. If it's raining, just wait it out and make your soap another day.
So while you may want to jump head in and start buying all of your soap making supplies, be sure to add the safety gear to your list.
Next week I'll share my soaping tutorial!
Tuesday, July 6, 2010
Soap Making 101: Resources
Resource #1, Information:
Books! Your local library or Barnes and Noble should have a bunch of great book s that cover all different types of soap making. A highly recommended book is The Soapmaker's Companion.The Soap Queen Blog recipes and all kinds of good info!
Lye calculators here and here.
CP soap recipes here.
Resource #2, Supplies:
Brambleberry I love their stuff! Great prices on all the fats, lye, molds and anything else you could need for CP soap or melt and pour soap! Not to mention, items to make lotions, make up, candles and more.

From Nature With Love They have GREAT essential and fragrance oils. This is my personal favorite when it comes to oils. They also have a wide range of other things, like Brambleberry, such as molds, bath accessories, candle making supplies, etc.
Mountain Rose Herbs Another great site for things like oils and fats, not to mention fun packaging containers, bulk herbs and tea!
Organic Creations They have a great list of organic supplies if you want to make organic soap.
I hope that this information is useful to you this month!
Monday, July 5, 2010
Soap Making 101: Cold Process Soaps

When I make soap here at the homestead, I use the cold process method. Cold process (CP) soap is made up of 3 things, a liquid, a combination of fats and lye. CP soap may sound intimidating to make but it truly is easy and fun if you take your time and do it safely. There are tons and tons of resources on the internet for CP recipes or you can invent your own. When making up your own soap recipe it is important to first looks up the sponification value of the fats being used on a sponification chart. You can then use that to calculate the appropriate amount of lye needed in the recipe. Too much lye in the soap, that is left unreacted, will result in a very high pH and can burn or irritate your skin. If too little lye is added then the soap ends up greasy. That's why you always see that "superfatted" % in the descriptions of soap. You want to superfat your soap to somewhere between 4 and 10 percent. That is going to ensure a safe and moisturizing bar of soap! If you're just starting out making soap then it's best to go with a trusted recipe before venturing out and creating your own.
Lye is dissolved in liquid, fats are melted down, the two are combined and mixed and then after weeks of waiting your soap is ready. Sound easy? It really is. This week well look at the supplies you'll need and the resources to obtain them. Plus a couple recipes to try!
Friday, March 26, 2010
too much of a good thing
If you're interested, please email me at mountainhomequilts@charter.net and we'll work out the details!
Wednesday, February 3, 2010
oh yes, there's more
Thursday, January 7, 2010
meeting goals
O.k., I'll admit that it is just one day into my "self sufficiency" adventure but I'm pretty proud of my achievements thus far. Today I; looked on Craigslist for a used (and cheap) item- instead of looking at buying new, made a batch of soap and baked a loaf of bread. Not too bad for a day one! Thursday, January 29, 2009
adventures in soap making
Here are a few shots of us creating!
Stuff for soap making
Linz and the stick blender
Our loaves after pouring
My loaf today after being cut On a funny note, working together, it took us about 3 hours to make the first loaf and 20 minutes to make the second one.