Showing posts with label nourishing traditions. Show all posts

Monday, November 15, 2010

Soaked Oatmeal

We eat soaked oatmeal almost every morning for breakfast. It's fantastic! We change what we top it with and that keeps it interesting each morning.
Soaked oatmeal is super easy to make plus by soaking it, you are releasing the vitamins and minerals to be absorbed by your body rather than blocked!
Sally Fallon, the author of Nourishing Traditions, said in her book, "Phosphorus in the bran of whole grains is tied up in a substance called phytic acid. Phytic acid combines with iron, calcium, magnesium, copper and zinc in the intestinal tract, clocking their absorption. Whole grains also contain enzyme inhibitors that can interfere with digestion. Traditional societies usually soak or ferment their grains before eating them, processes that neutralize phytates and enzyme inhibitors and in effect, predigest grains so that all their nutrients are more available. Sprouting, overnight soaking, and old-fashioned sour leavening can accomplish this important predigestive process in our own kitchens. Many people who are allergic to grains will tolerate them well when they are prepared according to these procedures."
Soaking grains isn't difficult either. All you need is some water and a neutralizer. In the case of Soaked Oatmeal I use our well water and yogurt. The recipe below feeds both my husband and I, and all of our children each morning (a 13yr old, 3yr old, 2yr old and 1 yr old) If you have more or less people in your family then you can adjust the quantity as needed.
Soaked Oatmeal
2 c water
2 c organic oats
4 Tb whole milk yogurt
1 1/2c water (for cooking the next day)
The night before, place oats in a glass or ceramic bowl and pour in water and yogurt. Stir until well combined.
Grains should be soaked for at least 12 hours so I usually make mine up while I'm preparing dinner.
Cover your bowl with a cotton dishcloth and allow it to remain on your counter until the next morning.
When you're ready to cook it, place the oats into a saucepan with the 1 1/2c water and cook on medium heat until water is absorbed (about 8 minutes.) I stir mine often because otherwise it tends to stick to the bottom of the pan.
I then portion out our oatmeal into bowls, add organic butter, maple syrup and cinnamon. We then top it with what we have on hand. This morning it was canned peaches and sliced banana. Add some organic whole milk (raw preferably) and enjoy!

Wednesday, July 7, 2010

Making Hommade Baby Food

Making your own homemade baby food takes a little bit of time but it is well worth the effort- not to mention less expensive! By making your baby's food you are not only saving money by preparing it yourself but there are less trips to town and less wasted food. Once you open a jar of baby food it is only good for a few days. I'll be the first to admit that I would open a jar, feed part of it, put it into the fridge and then forget about it. Or if my baby was especially hungry he or she may eat a jar and a half and then the second jar would get pushed to the back of the fridge and forgotten. What a waste of money! All babies are not the same and so while 6 or 8oz. may work for some, it doesn't work for all.Making my baby's food has allowed me to create wholesome meals by using fresh, organic ingredients. My baby is benefiting from the nutrients he is getting rather than missing out on them from processed baby foods. Who knows how long that jar has been sitting on the shelf...or where the food even came from. Even organic baby foods have been over processed and a lot of them are difficult to digest because they haven't been prepared properly.
Here are my tips in making your own baby food.

Foods to feed:
6-8 months: organic liver, pureed meats, soup stocks, raw mashed fruits (banana, melon, avocado, mango,) cooked pureed fruits (apple, pear, peach, apricot,) cooked pureed vegetables (squash, sweet potato, carrots, beet, all cooked with butter or coconut oil,) small amounts of fermented foods (kefir, yogurt.)
8-10 months: Everything above, creamed vegetable soups, homemade stews (ingredients cut small or mashed,) cottage cheese, custard, and if your baby can finger foods then lightly steamed veggie sticks, bits of cheese, avocado or banana chunks.
10-12 months: Everything above, grains that are soaked (grains should not be fed before 1 year,) raw salad veggies (tomatoes, cucumbers, etc.) citrus fruits, whole eggs.

You can steam veggies like zucchini in a steamer basket on your stove or cook fruits like pears directly in a saucepan.Add the steamed vegetable/cooked fruit to a baby food maker, food processor or blender (don't forget to add the butter with the veggies!) and blend.While taste does play a part in whether a baby likes his or her food, the biggest factor is the smoothness or thickness. For first foods, babies like smooth pureed foods. Make sure that you blend your foods well so that the consistency is just right. If the baby food needs thickening you can add yogurt, bananas or peas. To thin out foods use breastmilk or formula.Once the food is ready, let it cool to room temperature before pouring it into an ice cube tray. Fill each cube to the top and place into the freezer for 4-6 hours.
Remove cubes from tray and store in an airtight container in the freezer. If you'd rather avoid the ice cube tray then you can place the food in clumps (if it's thick enough) onto a baking sheet and freeze it that way.When you need food simply pull out a cube and set it on a bowl on the counter. It will thaw and come to room temperature in 1-2 hours. If you need it sooner than that you can place it in a glass jar or small bowl and then place that jar into warm water.
One of the best things about making your own food is that you can determine how much food you feed at a meal. If your baby is a light eater then 1 cube works great. You can add another cube, or even a third to increase the amount of food you feed.
Enjoy your baby and feel good about the foods you are nourishing him with!

Tuesday, May 18, 2010

Rendering Lard

Lard is a great source of fat to use in all kinds of cooking, baking and even soap making! If you raise your own pigs or even buy pigs to slaughter, you can ask the butcher to make sure that he saves you all the pig fat off your pig. There will be a lot. Depending on the size of your pig, probably about 6-8 quart jars full of lard when you're done rendering all of it.

To make lard, you'll need a couple supplies:

Pig fat (that's a given I think)
Some source for heating it slowly. I use a crock pot but others have used their oven or stove top.
A couple bowls and jars
A strainer and some cheesecloth


Step 1: Cut up the fat.You want to clean the fat of any leftover meat or skin and cut it into apx. 1" pieces. Your pieces should be white. Depending on how good your butcher is, or isn't, you may need to trim a lot off.
Pieces, like this one above, need to be cleaned up quite a bit. You don't want to be cooking meat along with your fat.
Step 2: Cook the fat.I like to do mine in the crock pot on low or warm. You're going to cook it for about 12 hours, stirring occasionally. As it cooks the chunks will melt down into a liquid.
Not everything will melt down though, in my experience. You will still be left with a little at the end that looks like this:Step 3: Strain the fat.
You'll want to strain all the liquid off of the remaining mush through a strainer and into a bowl. Don't worry about any little bits that get into the liquid at this point, we're going to do a second straining later. If a lot of fat chunks are left you can continue to melt those down in your crock pot for another few hours.
I would recommend using, if you have one, a large glass bowl to place your strained liquid fat into.
Then, add 1-2c of water to your liquid fat.
Refrigerate over night.
Step 4: Skim off the lard.
Letting the liquid cool over night will allow it to separate into lard, on the top, and the water and bits of fat (that went through the strainer) on the bottom.
Now it's time to scrape off the lard.I made the mistake of using a large stainless steel pot this time. Since the bottom is so wide on the pot, it makes it difficult to skim off the lard once it's cool. As you can see from the picture below, some of the leftover chunkiness had to be scraped from the lard.Step 5: Melt down the lard in a pot.You're going to melt down all the cooled, hardened lard in another pot till it reaches a liquid form. Then place a cheese cloth (or thin cotton dish cloth) over a strainer and pour your lard through the cloth. This will catch any of the last tiny little bits of fat and give you a nice clean lard.Step 6: Pour your lard into jars.Place a lid on the jars and store in your fridge. You can store it in your fridge for up to a year. If left out on a shelf, maybe for 4-6 months. You can also freeze your lard.

Thursday, May 6, 2010

beet kvass

I am just getting around to posting this now although I made my beet kvass about 3 weeks ago. I figured better late than never, right?

Let's start off with the truth: Sally Fallon calls this drink, "something you wouldn't serve to guests." I'd say she is stretching the truth a little there. While the drink has amazing health benefits (aiding digestion, liver cleansing, blood tonic, promoting regularity, etc.) I find it hard to even serve to myself. I'd consider myself a fairly fermented liking gal. Or, in other words, I like fermented foods. I really love kraut and kefir especially. YUM! But this drink is gonna take some getting used to.

The first thing you're going to needs is beets. Good, organic beets; 2-3 depending on their size. Peel and chop coarsely.


Then you'll need 1/4 c whey, 1 Tb of sea salt and apx. 2qts of filtered water. We're on a well so our water is free of things like chlorine and fluoride.

Place beets, whey and salt in a 2qt glass container and fill with water. Stir well and cover securely. Keep on your counter for 2 days.


Now, for some reason Nourishing Traditions always seems to have the "2 day" rule about letting things ferment on your counter. Maybe it's my house temp or our climate but 2 days never cuts it for me. Our kraut sits out on the counter for a good 2 weeks before it's ready. I let the beet kvass sit out a little too long and it started to develop a light scum on the top. I scraped all of that off, strained my beets and placed the tonic into the fridge. It's recommended that you drink one 4oz. class morning and night.

So try not to gag (I know, that doesn't sound very promising,) and drink it for your health!

Sunday, April 18, 2010

making cream cheese

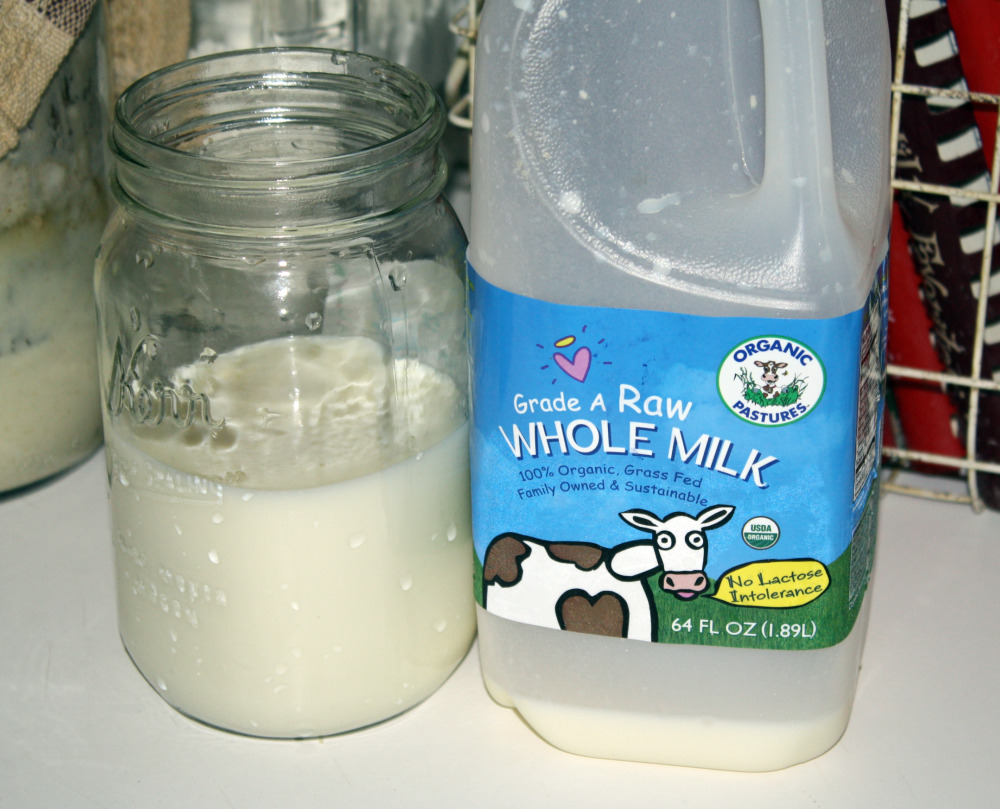
Cream cheese, even organic, from the store has been heated and does not contain any live enzymes. Making your own cream cheese at home is probably easier than you thought!Take as much raw milk as you'd like, pour into a jar and let it stand on your kitchen counter for 1-4 days (until it separates.) Once separation occurs, pour the milk over a dishcloth-lined strainer that it placed over a bowl (Sorry, I forgot to take a picture of that step!)
Let the cultured milk strain. This will remove the whey from the milk. Put your whey into a jar and keep it in the fridge to use for things like soaking grains, additional whey for your kefir, etc. Whey helps in the digestion of food.Then take your dishcloth and tie it up over a wooden spoon. Place the spoon over a large bowl and let sit until the last of the whey stops dripping. You want to make sure all the whey is removed. Once it has stopped dripping you can pull the cheese out and place it into a jar- and viola! ready to use cream cheese!

Thursday, April 1, 2010

kefir

Kefir shakes are quickly becoming a morning favorite in our home. Probably because of the yummy fruit in it more than the health benefits.

We add frozen strawberries and blueberries, flax seed oil, 2 grass fed egg yolks, about 1/4 yogurt (just to add a little sweetness) and some whey. What do you add to your kefir? I'd love some yummy suggestions on what else we could add! I had thought of coconut oil but I wondered how it would do with frozen fruit? Would it just clump up?

Related Posts with Thumbnails